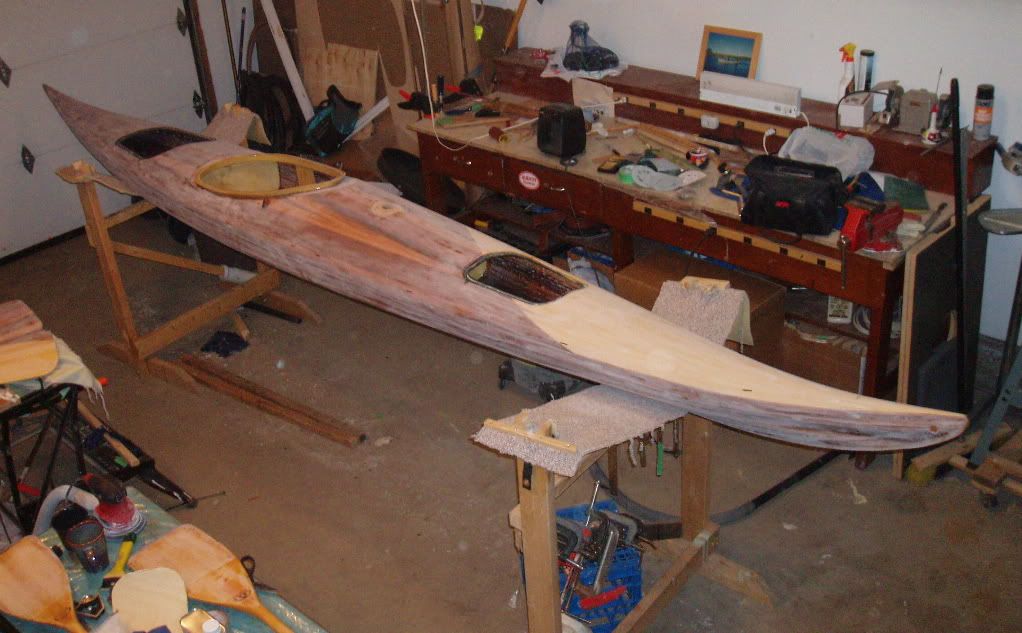
I made some more progress over the past week, having made a big push in order to try to get ready for fiberglassing by yesterday (Sunday) morning. I didn't get that far, but at least I'm closer.
I had filled all the gaps on the deck with thickened/coloured epoxy, and I did the same for the gaps in the hull. I then set about scraping all the excess epoxy & thickener off. Well, that has turned out to be quite a chore. I have sanded, scraped (with a sharp paint scraper and with cabinet scrapers), planed in an effort to remove this rock-hard crap.
{For future reference: it's probably way easier to do this when the epoxy is in the "green" stage of curing rather than the "granite" stage.} I eventually got all of the extra dookie schmutz (that's the technical term) off of the hull, only to have revealed more gaps in the process. Frankly, I think I'd best leave those alone before things start getting worse. I am only half done cleaning up the excess dookie schmutz from the deck.
I also attempted to get those stems laminated into place. I had wanted to make use of some walnut I had laying around (cutoffs bought from the local
Habitat Re-Store) so I cut it into approximately 1/8" x 1" x 3-4' strips on the band saw. These strips were pretty uneven in their thickness and were far from smooth, but I figured they oughta be good enough to do the job of protecting the stems from wayward rocks. As mentioned in my last post, I steam bent them, and taped them in place to dry. I later decided that the job of bending was pretty unsatisfactory at the tips where the bend is greatest. It was hard to get them to bend just the right way and have them align well and remain clamped in place on a rounded tapered surface. I decided instead to try
ash, since it is renowned for being easy to bend, and is well suited to the job of protecting the softer cedar while being easy to carve to match the shape of the boat. I went to my
local Windsor Plywood and picked up a 4/4 6" x 4' piece of ash and another of walnut. While there, I paid a few extra dollars and had them cut the ash into 1/8" strips and they did a MUCH nicer job than I did on the bandsaw. Before using the ash strips, I decided it was worth a try to cut a solid piece of walnut to fit, rather than attempting to bend wood. I made a template out of cardboard and transferred the shape to the walnut and cut it out on the bandsaw. The fit needed tweaking, but I found working on the concave curve to be difficult, so I turned my attention instead to using the ash strips. In order to make handling the strips manageable, I taped one end of 6 strips together, then taped this bundle to the keel on the bottom of the hull. I then bent the strips to the keel and taped the strips in place as I went. Once the curve became greater near the tip, I used the heat gun to soften the wood fibers and allow the wood to bend more. What I found with my (mis)application of this technique was that I could create a very sharp bend in the wood (a sharp 90 degree bend was easy), but it was hard to get the wood to bend gradually over a short distance. This probably was a factor of my inexperience. Regardless, I got the wood bent acceptably to match the curve of the stem and taped & bungeed in place until it could cool. With the wood pre-bent in this manner I then mixed up some dookie schmutz using epoxy and the 406 Colloidal Silica to create a mayonnaise consistency glue and painted this on to each side of the wood strips, stacked this up then attempted to wrestle this slimy greased up mess onto the bow stem, taping it in place with fiber-reinforced tape. This proved to be a bit tricky, as two gloved hands were required to keep the pile of strips in place, another hand was needed to wrap the tape around, and another hand was needed to cut the tape with a knife. The whole operation is complicated by the fact that the substrate being attached to is round and tapered. Add to this the fact that my rubber gloves kept disintegrating (if
Home Hardware made condoms, I think they'd have an awful lot of paternity suits on their hands; if the gloves I used at work were this crappy, I'd probably have died of strep pneumonia or a staphylococcal infection by now), and I was not a happy camper. However, I managed it by myself and soon left the taped, bungeed, strapped conglomeration alone to cure. Thankfully,
Rob was able to come by in the evening and this made the repeat process on the stern a lot easier.
I shoulda had a look at
this guy's blog - maybe those inner tube straps would have worked better than the tape.
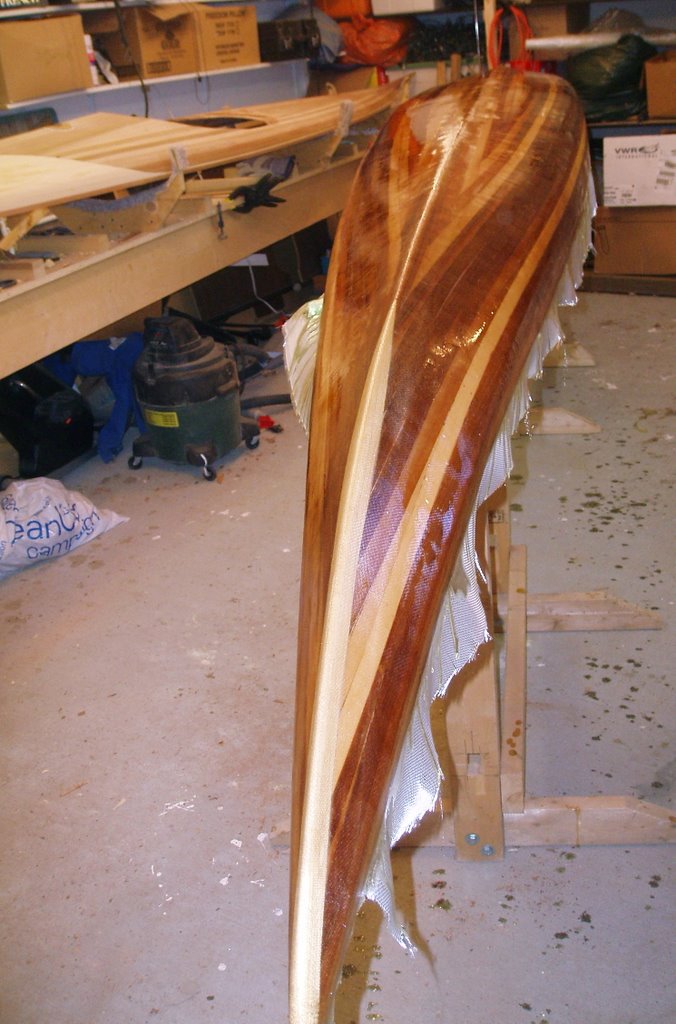
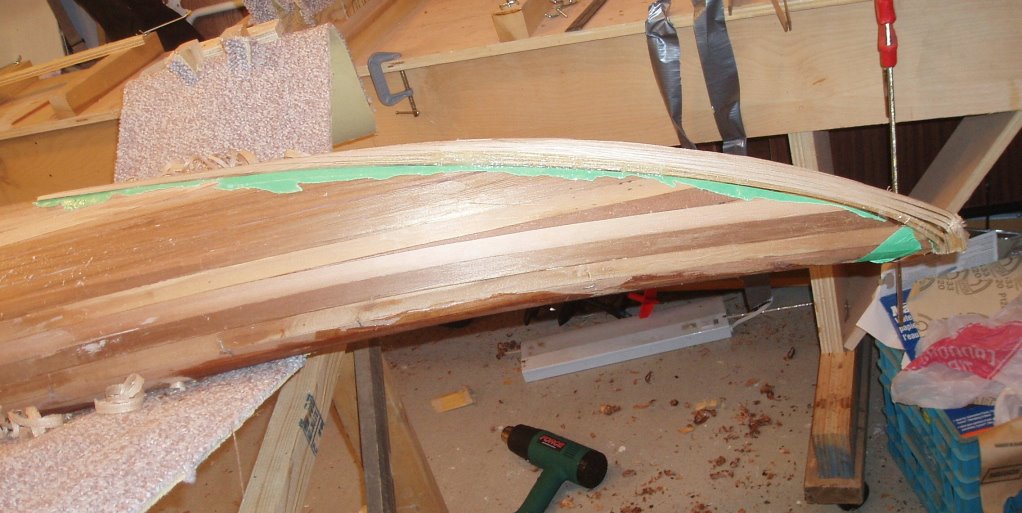
Here's a picture or two of the stern stem laminations taped in place. I used the green masking tape to mask off the area so that there would be less epoxy to clean off of the hull. This is the one Rob helped me with; the one I did alone wasn't quite so neat.


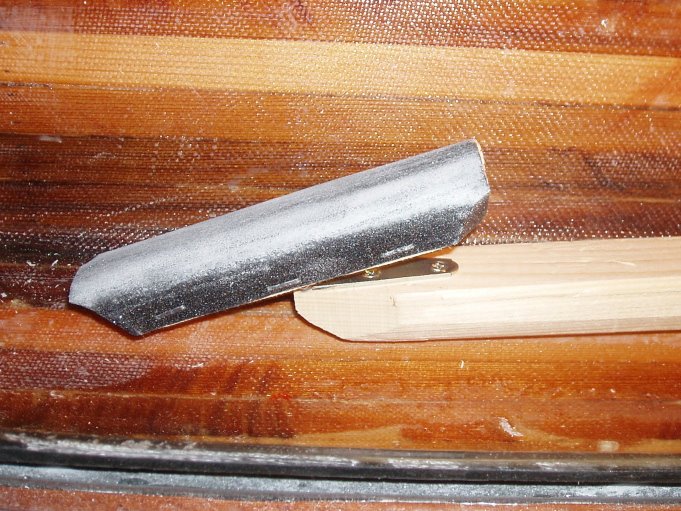
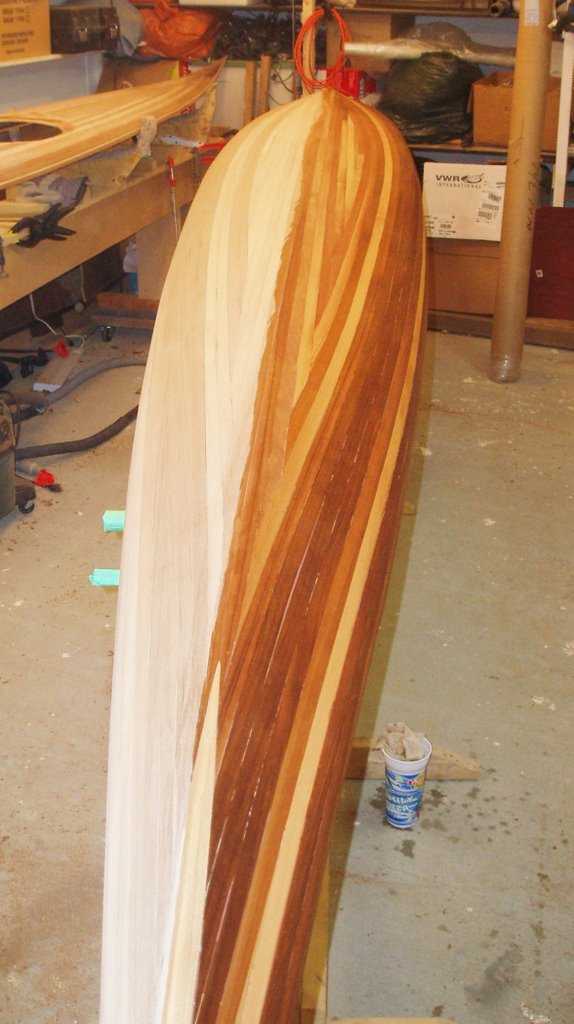
Once I removed the strapping tape a problem at the stern tip became evident:

Looks pretty bad, doesn't it? It seems I didn't have things aligned well enough at the tip and/or it wasn't taped in place tight enough. I began shaping the stem with the block plane anyway.

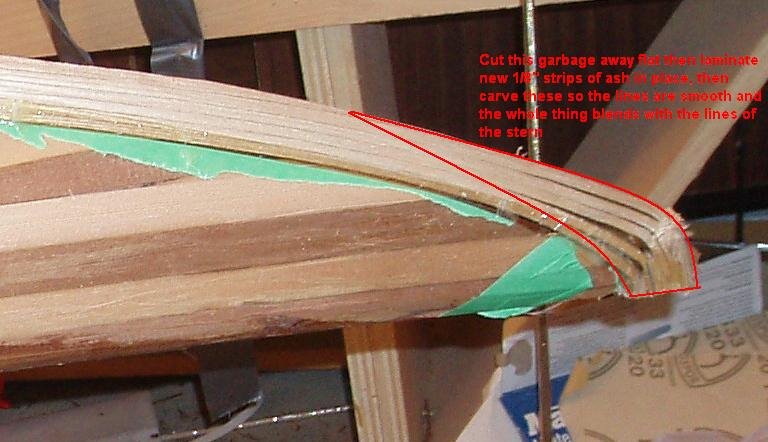
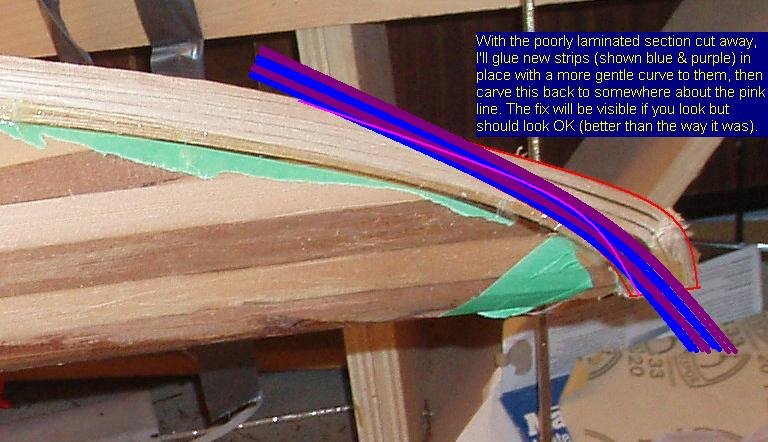
Note that I masked off the hull too close to the stems, trapping green masking tape under the stem edges. This was all planed away in the process of shaping the stem so it's not so bad as it looks. The next couple of images show how I intend to fix the problem of the crappy lamination & bends. I'll cut away all of the poorly laminated section, leaving a gently curving squared off area on which I'll glue some new pieces.

Once those pieces are glued in place, I'll shave them down to match the flowing lines of the stern.

The only thing I'm not too sure about is how in the heck I'm going to clamp those suckers in place until the glue sets. One thing I thought of was to maybe use thick cyanoacrylate glue with accelerator so that they wouldn't need to be held for long. Anybody know if this will work? Is it strong enough to withstand the abuse that planing would put on the glue?

 The other morning I decided to fix the loose hinges on the door to our basement. The screw holes in the mdf door had loosened so that they didn't hold the hinges tight anymore. Like most boatbuilders would, I turned to epoxy for the solution. I took the door out to the garage, removed the hinges and dribbled some mixed epoxy (West System 105 resin, 207 hardener) into the holes then painted on a bit of epoxy thickened with 406 colloidal silica and screwed the hinges back in place. Those hinges should be very secure now!
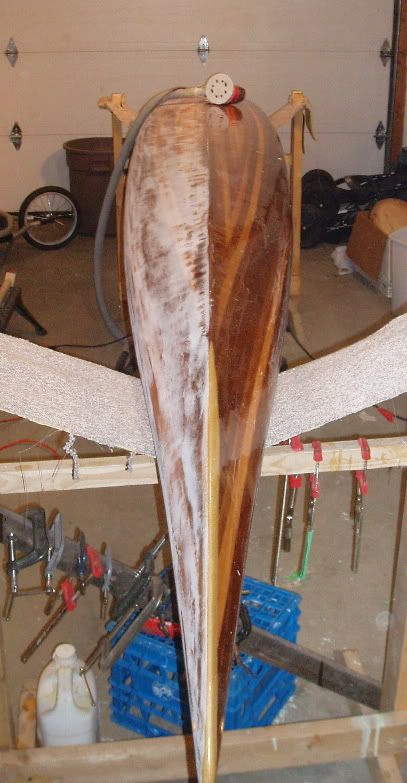

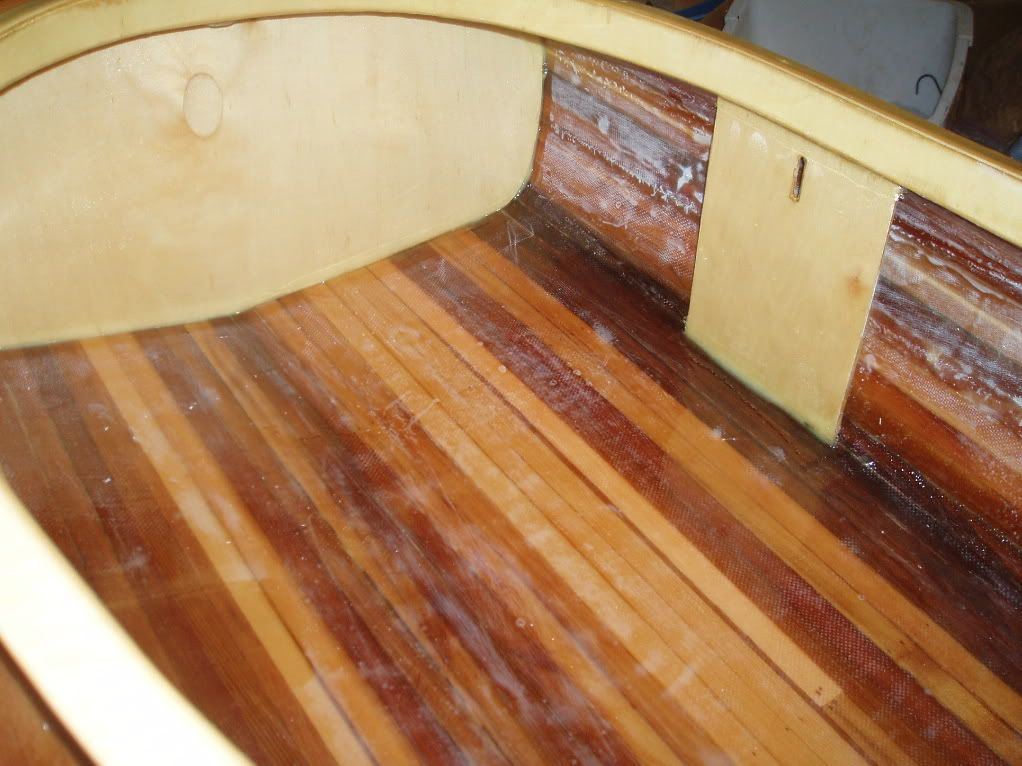


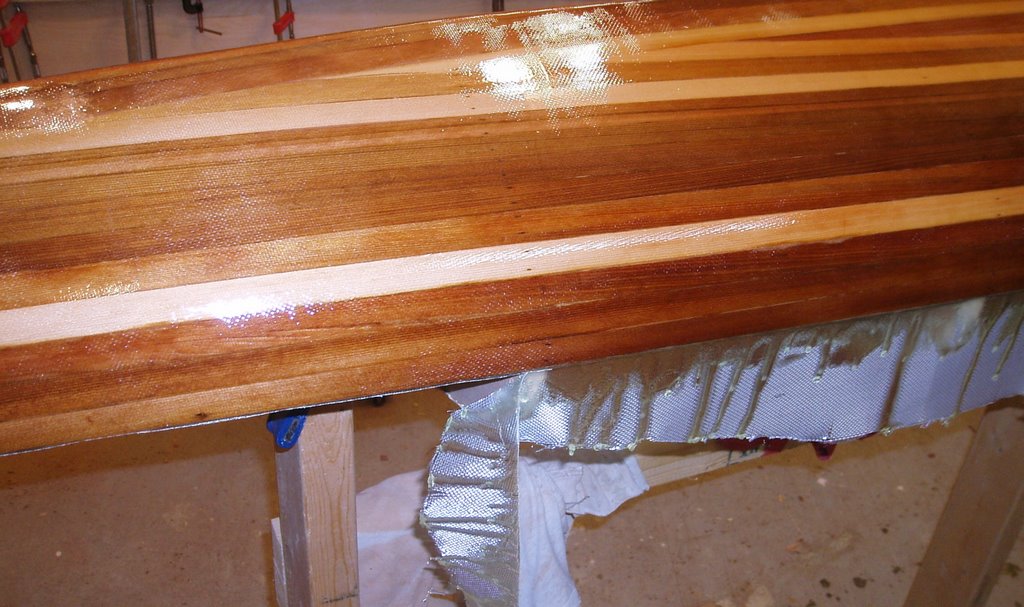
 In the picture above you can see that in addition to the green masking tape that I ran out of, I also used brown masking paper. This paper has a light adhesive on one edge (like a sticky note) and I turned to it because it was what I had available at the moment. However, I would advise against others using the same stuff - although waxed, the epoxy soaks through the paper and gets stuck to the kayak. Thankfully it scraped away fairly easily and at least the brown colour matches the boat so if I missed anything it should be inconspicuous (at least it's sufficiently inconspicuous that I couldn't find any more of it).


