Thứ Hai, 27 tháng 3, 2006

Pat Just Got Back From N.Z. and Uganda


Pat left the great white north of the Ottawa River which is still locked in somewhat with ice so that he could thaw out his bones on the west coast of New Zealand and the White Nile of Uganda. New Zealand is such an awesome place to go because of so much good paddling and the surroundings are completely surreal. Lots of crystal blue, green, glacier water. Big Glaciers with crumbling faces just off the road and miles of beach with good breaks as well. Pat and Ben Brown threw some photos my way of thier time in N.Z. as well as Africa.


You have all seen shots from the Nile in Africa by now but Ben shooting these sweet shots and Pat are an amazing combo. Thanks to Ben Brown for the photos to use and Pat for ripping the way he does.


Pat is doing some really cool backwards moves out of a spin right now. I know there are cool names for this but I am less concerned with the names and more psyched to see the play moves constantly moving forward, or backwards as it would be.


Going Large.


This is the craziest looking drop. It just isn't right. It looks just horrendous but pretty much everyone seems to go through. Sometimes with big downtime, sometimes swimming but everyone seems to go through.


Thanks Pat and Ben for the awesome shots.
Shane

Chủ Nhật, 19 tháng 3, 2006

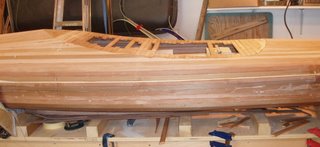
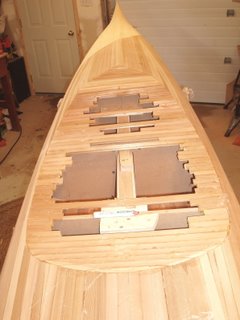
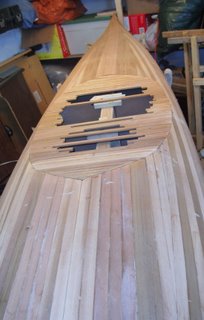
Cockpit recess stripped

Well I finally got a bit of time to do some more work on the boat this weekend. I finished stripping the recessed cockpit area. Short strips were glued in place with the Lee Valley 2002 GF wood glue that I've used for most of the boat, but dabs of hot glue were used on the inner end of each piece to hold it in place so that I didn't have to wait for the glue to dry before moving on to the next series of strips. Dabs of hot glue were used here and there in other places too to ensure that all the short strips stayed where they were put. The whole recess took an ridiculous amount of time for something so simple. Next time I think I would seriously consider laying in a piece of thin, flexible plywood instead.

Stern to bow shot:

Bow to stern shot:
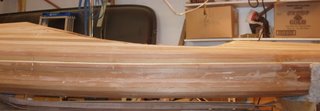
Side profile:The above photo shows how the recessed area lowers the final cockpit position, especially on the rear deck.

Finally, a frankensteinian panorama:
That's it the deck is practically finished right??....... (stay tuned to see what's in store next)

p.s. If anyone can tell me how to quickly do a passable job of adjusting the colours in a digital photo to have things look a little bit realistic, I'm all ears. I play with the colour balance, gamma, tone, brightness, contrast and that thing with the curve that does wicked things to a photo, with limited success at best. I've got all the tools, I know how to turn them on, but I don't properly understand what they do or when to use them. Most of my shop pictures turn out too orange maybe due to the colour of the wood and a light source with a warm tone as seen by the camera.

Thứ Sáu, 17 tháng 3, 2006

What some folks do to their boats

Recently on the kayak building bulletin board, there was a discussion regarding the perceived fragility of the fiberglass composite boats know as "strippers" or cedar-strip canoes & kayaks. One of the folks to relate their experiences was Bjorn Thomasson, who replied:
"A stripper is a delicate thing! Look what happened to my Nomad, just for a simple somersault backwards in 13 ft breaking sea and hitting the rocky bottom with the stern! Disappointing..."
The post was followed by a picture of his broken kayak with the rear 2 feet sheared right off. In case you didn't notice, Bjorn was speaking very much tongue in cheek in his answer. Bjorn has also provided the story (Swedish with English translation) behind the "incident" and pictures of the broken kayak and the ensuing repairs. It's worth a look if only for the dramatic pictures. It also shows another advantage of wood boats - their ability to be repaired. Simply put, if you can build it, you can fix it.

Another response in the same discussion was posted by "Ken C":
"I keep my strip kayak hanging from webbing loops in the garage ... one day, I was bringing it down and in a momentary lapse of coordination, I lost control of the boat ... it came crashing down onto the corner of my jointer table (rock-solid cast-iron surface with lotsa angular corners, if you haven't seen one), and then bounced down onto the bare concrete floor ...
"oh, darn" says I ...
I took a minute to calm down and jump-start my heart again, before inspecting the damage ... the neighbors must have been wondering what the commotion was all about ... I was sure I'd be patching a gaping wound, but when I finally got up the nerve to go and look, I couldn't even find a mark ... no dent, no scratch, no glass showing ...... nothing.
I no longer walk on eggshells - these glass/wood/glass panels are TOUGH. "

Not as dramatic as Bjorn's testing efforts but perhaps relates closely to something I'm likely to encounter (not often we see 13' breaking seas on the South Saskatchewan River or at Lakeview Pond).

Thứ Hai, 13 tháng 3, 2006

Thoughts about Daniel.


I paddled down the Green with Daniel and a big posse of people the other day. It was his birthday.
It seemed like most of the Asheville paddling crowd was there. It was a lot like any day on the river with that crew.
Meeting at the takeout, walking the trail, chatting, talking shit, and getting psyched for another run, fast lines,
and a good adrenaline pump at Gorilla. Daniel and few others caught a rediculous eddie 5 feet above the notch.
Other than that it was a fairly normal Green run. But now its totally different and things keep coming back to me
from that day and they have so much more significance now. I remember grinning with him in the parking lot over something funny that happened. He gave Whitney advice on how to run Boof, and she slicked it.
I had a super smooth run through Go Left and I remember looking back upstream at the rapid that day and remembering that Daniel had gotten me off the couch a few years before and had really helped me push myself to get paddling hard again.
I always love catching the eddie after the notch at Gorilla because it is one of the coolest eddies in the world. Just look around. At the take out we shared a 3.2 beer that had been rolling around in Johns van since Salt Lake City and laughed about the stupid eddie they caught, Tommy being a dad, extreme fishing, and how many times Jason thought he could walk back up and run Gorilla in one day.

Then I got a phone call and the river will never be the same.

In the days since that phone call I have paddled the river.
It's like paddling through an album of thoughts, memories, and emotions.
What makes any river powerful for me are the adventures that are shared there.
I don't feel something from the river. I feel something from the people, experiences, conversations, and lines that build up my feeling of what that river is all about.

My first trip over Gorilla after Daniel died was intense.
Someone put a rock cairn at the notch over looking the drop.
It was powerful.

The soundtrack of the notch, gorilla, and the slides are full of Danielisms.
"Yeeeeeeaaaaaauuuuuuuuhhhhhh"
"Yeah Dawg"
"Yeah he slicked that shit"
"Time to Run the Shit"
"Ride the Lighting"
It just rolls around in my head.
Not a bad soundtrack.

I put together some clips from that day paddling with folks on Friday. Daniel did so many amazing things but what I remember are days out on the Green having a good time with he and the rest of the gang. These shots are things that happened and thoughts of experiences I had with D on the river.
Video Thoughts of Daniel, Click This


Google Mars

Tired of paddling the same old places? Need a new frontier to bag a "first"? Try here.

Thứ Hai, 6 tháng 3, 2006

Lack of Progress

Kayak progress has been pretty much stopped lately. Between sickness (the whole family seems to be just continuously cycling through colds), work, and getting our house ready to sell I haven't done a thing on the boat in about 2 weeks. We bought a house last week (20'x24' attached garage with 10' ceilings, insulated and drywalled - I need to add lots of light, lots of power, a source of heat and I'll have a boatbuilding shop ready to go) so now I have to finish all sorts of things around our house and get it ready to sell. We've gotten a lot done on that front over the last couple of weekends so the list is getting shorter. Then I'll have to clean up the shop and make it presentable. By the way, if you want to buy a boatbuilding workshop (220V, lots of light, electrical outlets every 6', insulated, drywalled) with nice yard and detached house, let me know!

As you see it in my previous posts is pretty much how the kayak sits right now. I'm not in super big hurry right now anyway since the next few steps involve epoxy so I'll have to warm it up and keep it warm for a period. Thus, I want to wait until it's a bit warmer outside and also where I can do a lot of work on it in a single stretch. Aside from the actual fiberglass work, I need to fill all the gaps and I'll use a epoxy putty mixture to do that with. I also need to attach hardwood stems which will be glued in place with epoxy (though I could use a polyurethane glue or another glue).

Right now I'm 1/3-1/2 way through filling in the cockpit recess, a flatish area (curves in only 2 dimensions instead of 3) where the cockpit hole will eventually be cut and it's proving to be a PITA because it takes time to properly fit all the short horizontal strips just so without a gap. I was considering using a chunk of thin plywood (walnut or mahogany or luan?) and bending it in place to fill the recess much as would be done for a stitch & glue kayak, but I decided to do it the way the book said since I am too cheap to go buy plywood and preferred to use up my scraps of cedar. Now I'm wishing I had used the plywood. If I had gotten the ply, I would also use it for the whole cockpit area including the riser and the rim (there is a lip that sits above the cockpit opening about an inch which allows you to attach a spray skirt and also keeps the water out when not using the skirt). I'm still thinking about plywood - I think mahogany/luan might look OK with the cedar, and I think in the end it would be lighter, maybe stronger, and easier. (I just called around & I can get a 4x8 sheet of 1/8" ribbon mahogany for $19 - I think I'm sold but I'll have to see what it looks like and how flexible it is). Once the recessed area is finished, sanded and all the gaps filled (filled for two reasons - aesthetics and so that they don't just fill with plain epoxy during glassing which would add weight) I'll fiberglass the deck then flip it over to work on the bottom. I already had it flipped over and was working on the stems and have the bottom half smoothed, but the deck flexed a lot because it wasn't being properly supported and I think it would be better to have the deck strengthened with fiberglass before I flip it over again. Either that or I have to make some cradles to better support the deck while it's upside down (my cradles are shaped to fit the bottom - probably just the webbing slings of my boat stands will work too without creating pressure points). By spring I should have a boat that floats but doing the finish work will take some time too (seat, back rest, hip padding, deck lines, varnish).

So here is what I have yet to do in approximate order, though that may change:
  1. Fill in the cockpit recess whether with strips or plywood.
  2. Fill the gaps in the deck.
  3. Cut a 4" hole in the deck in front of the cockpit and insert a hand-carved feature piece inlay (which is almost complete but isn't quite there yet).
  4. Seal the deck with epoxy (might be done shortly before fiberglassing).
  5. Fiberglass the deck top with 4 ounce glass.
  6. Flip the boat over into the boat stands with webbing.
  7. Bend strips of walnut to form the the keel strips & glue in place. (I've already got the strips cut and bent using a heat gun, but I have to decided if they are good enough)
  8. Plane, scrape, sand the bottom and fair the keel strips into the hull.
  9. Fill the gaps.
  10. Precoat then fiberglass the bottom (multiple layers).
  11. Flip the boat back over.
  12. Cut out the cockpit opening.
  13. Build the cockpit riser (short strips of cedar or a piece of plywood)
  14. Fiberglass the riser.
  15. Build a cockpit lip (by laminating thin strips of hardwood or cutting the lip out of plywood), trim the riser above the lip and smooth the edges.
  16. Fiberglass the lip.
  17. Pull the deck and hull off of the forms.
  18. Scrape, plane and sand the inside of the kayak fair.
  19. Fiberglass the inside, reinforcing certain areas.
  20. Cut hatch openings.
  21. Install fittings for deck lines.
  22. Attach the two halves.
  23. Install bulkheads.
  24. Apply the epoxy fill coats to fill the weave of the fabric.
  25. Varnish
  26. Build and install seat, back rest.
  27. Install deck lines.
  28. Paddle.
Wow, maybe I shouldn't have started that list. I was feeling OK with the progress but now I'm overwhelmed with what remains.

Thứ Năm, 2 tháng 3, 2006

The Bigfoot Vision 56 is shipping to stores now!


Dealers should start to have the Bigfoot in stores anytime now. We have been making them for the last few weeks and they are shipping now. The Bigfoot maintains the same hull and deck except for the foot bumps which were raised nearly an inch. Which creates a ton of extra room. I already have had several people check the boat out that couldn't fit in the Vision before. If you couldn't quite get in or get comfy before you should give it another shot.

Here are some comparison shots to the original Vision 56. The Orange boat is obviously the Bigfoot and the Yellow boat is the original Vision 56.


Here is a link some awesome Vision footage.
  • Marlow Long in a Vision

  • Pat Camblin in a Vision