Thứ Hai, 26 tháng 3, 2007

Waterwalker Film Festival, Bulkheads & Mobies

The Waterwalker Film Festival this weekend was great. We had three fantastic guest speakers and many great videos. Thankfully, there were only minor glitches in my area of responsibility - the A/V aspects (thanks Rob!), such as a DVD that refused to play the portion we wanted to watch (we receive burned copies of the films from Paddle Canada). Lynda Holland told us about her travels in far northern Saskatchewan, NWT & Nunavut, and stories of the Dene that historically inhabited the region. Laurel Archer presented photos and told us about paddling the rivers of northern B.C. Paul Lapointe gave us a totally unique version of a trip report slide show wherein rather than photos of the trip, he showed us 48 of the paintings he produced while on the Fond du Lac River. The Waterwalker Film Festival this weekend did have a boatbuilding connection - Martin & Heather of Kisseynew Canoe Company rented a display table at the event and had a very nicely done strip canoe on display.

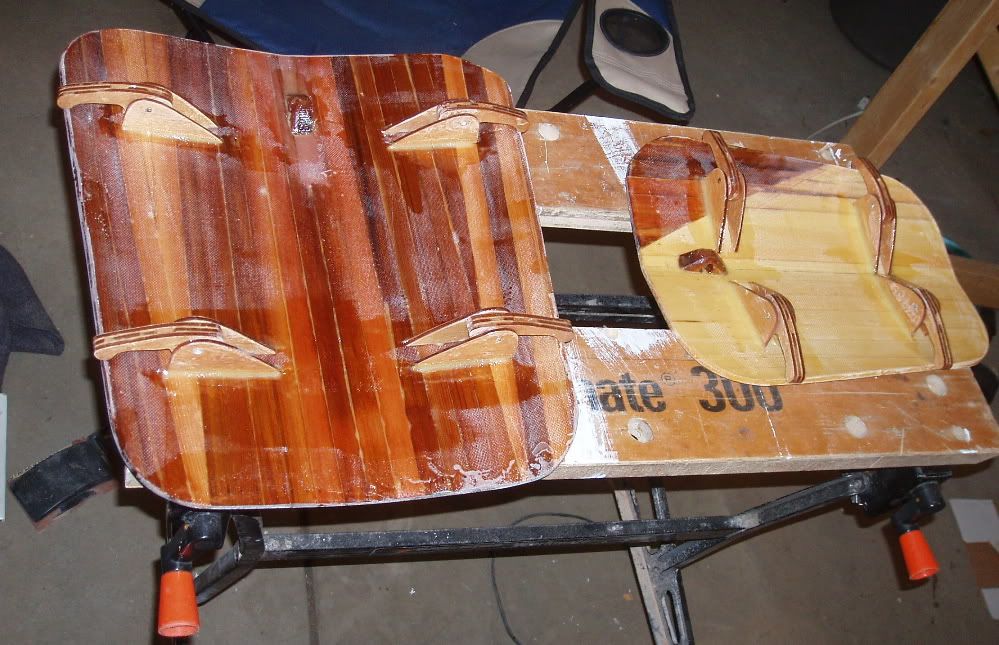
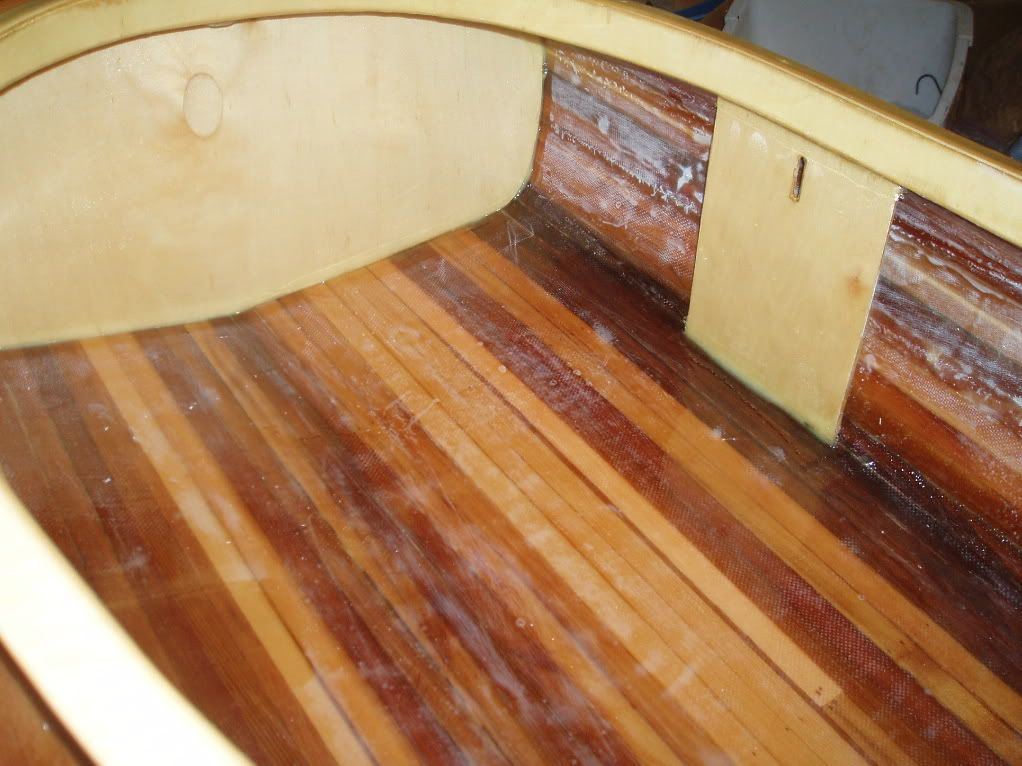
I also managed to make some progress on the kayak over the past few evenings. The cheek plates have been glassed (4 oz) both sides with a fill coat of epoxy on each side. The bulkheads have been similarly treated but the front bulkhead (support for the footbrace) received 2 layers of 4 ounce glass on one side and one layer on the other. The bulkheads were trimmed and installed into place using a fillet of epoxy. For the record, epoxying bulkheads into place on a fully decked boat is a real PITA. The fore bulkhead was some distance (18"?) from the hatch opening so in order to get in there and apply my fillet, I turned the boat upside down on the stands then crawled underneath and poked my head in through the hatch opening. However, there was no room in the small opening for both my head and my arm, so the actual applying of the fillet (and associated clean up of gobs of epoxy) was done mostly blind. I used a 20 ml (?) syringe with the tip bored out to 1/16" to apply the thickened (WS 406 colloidal silica) epoxy then smeared it smooth with a gloved finger. The same thing was done from the other side but, thankfully, the cockpit opening is a bit larger than the fore hatch and the space less cramped (though the bulkhead is farther from the opening). The rear bulkhead was a much easier beast to tackle, though it too involved reaching into cramped quarters through the nearby hatch opening. The much, much easier to tackle cheekplates were installed with a fillet covered with a strip of 4 oz glass cloth for strength.


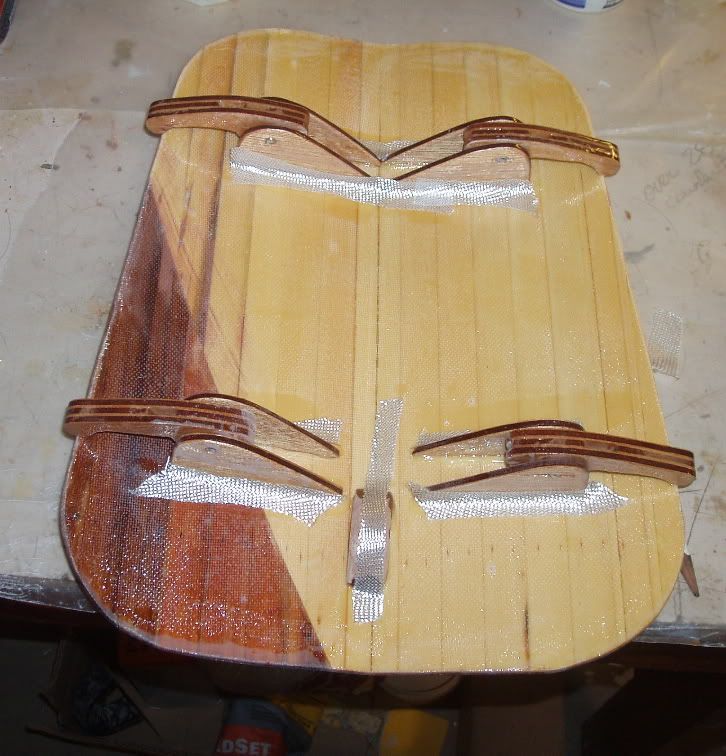
It was nice to also get the "mobies" installed on the underside of the hatches this weekend. They too were filleted in place using epoxy thickened with WS 406 colloidal silica, overlaid with a strip of 4 oz glass. The bungee cords that provide the tension can be installed after I double check that all wood is sealed with epoxy (I think I can probably use varnish on the spots that may have been sanded through to wood during their manufacture). I will create a separate blog posting (with photos) about manufacturing the Moby Latch System someday soon.
Now I have a couple of small sections along the seam to better fill the weave on (I started on this yesterday but I have to have a close look to see if there are more spots). Once that cures I will need to do final sanding on the whole kayak. Then it's time to get ready to varnish this boat! (Yay!) Once varnished, I will install the deck padeyes & lines and head out for a paddle. (I guess I should also make a seat, make the footbraces, and complete then install the backband.)

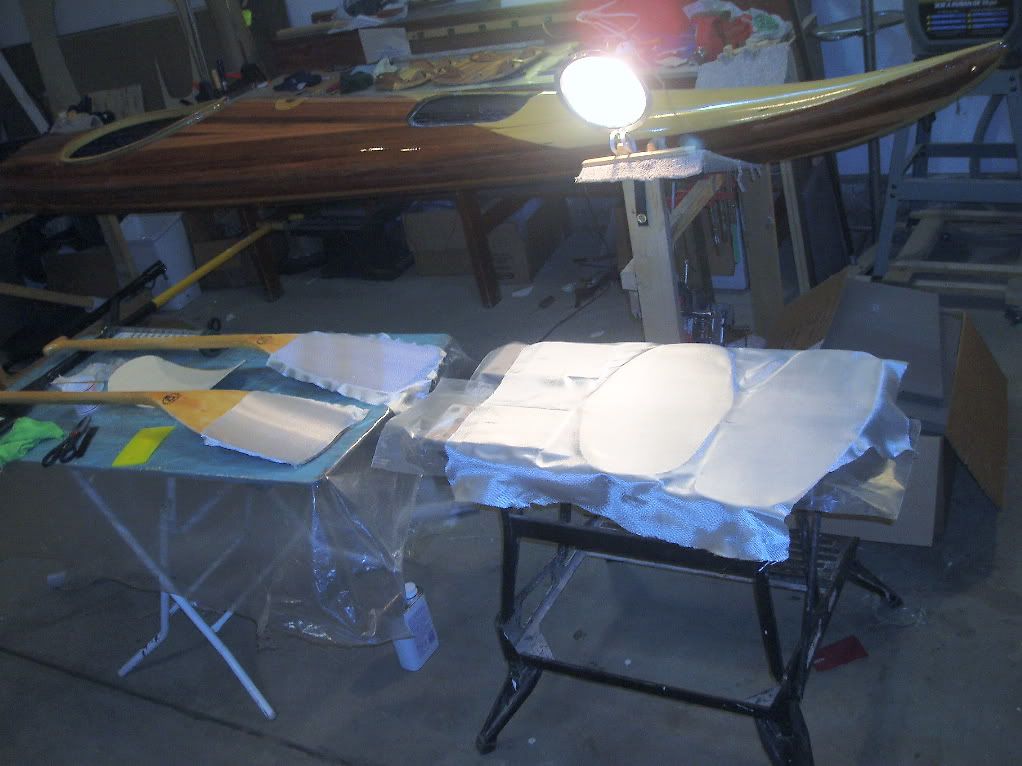
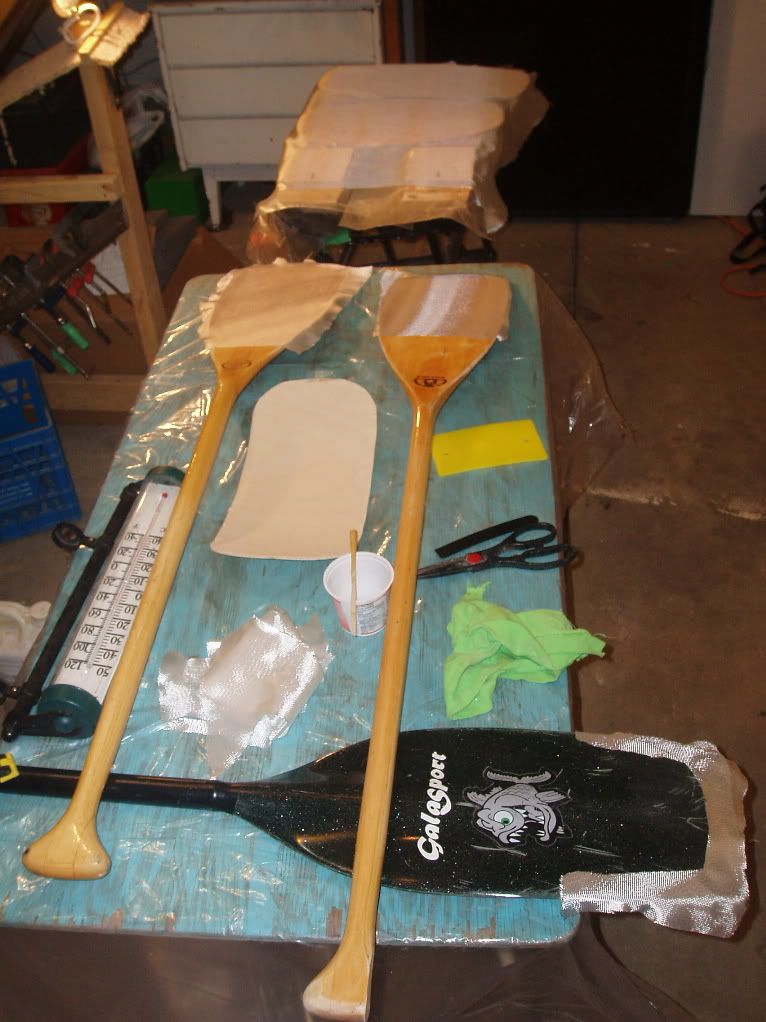
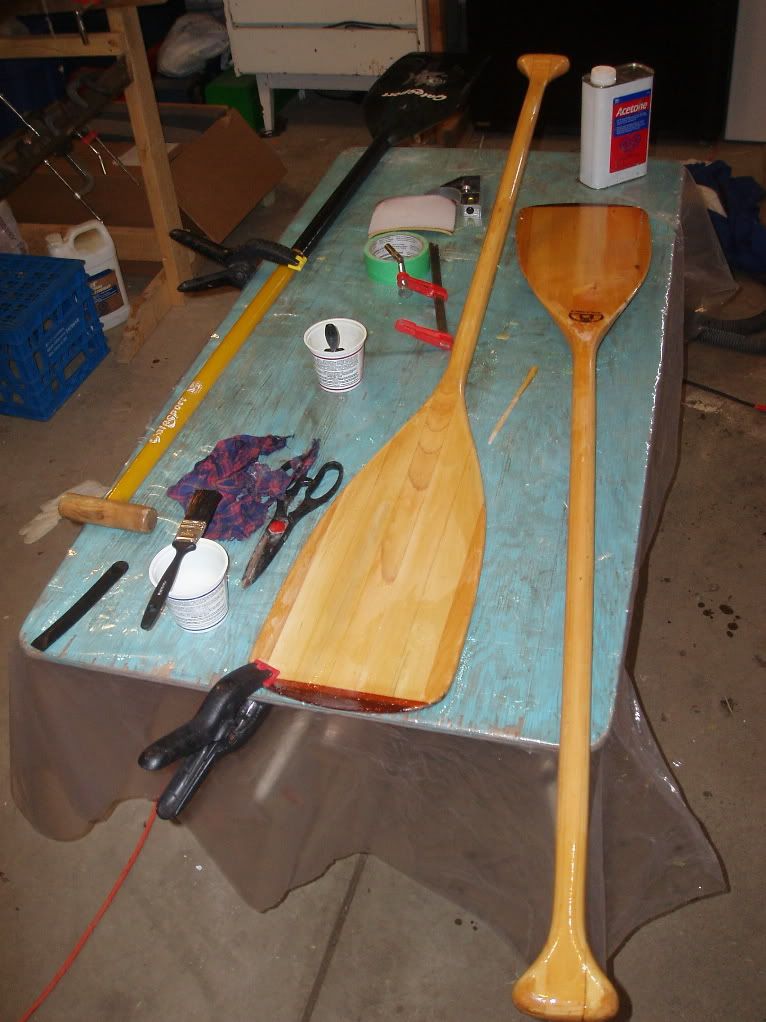
I have also been working on getting some paddles ready for the season and they too are now just about ready for varnish. Last fall on a trip I suffered two broken canoe paddles. For some unknown reason the blade of my wife's bent shaft paddle split (which is a problem since she wasn't even on the trip). Also, my own bent shaft suffered a broken grip when one of our esteemed members of North Star Expeditions used it to put a nice walleye out of it's misery and hit a rock instead. This paddle too had cracks beginning to develop on the blade. Thus, both paddles received 4 oz glass cloth patches at the cracks on one side (non-power face) while the lower 75% of the other side was covered in sheath of 4oz glass and the weave filled by squeegeeing very thin coats of epoxy on. The handle of my wife's paddle was also wearing from abrasion so it received a coating of epoxy (something I had done to my own paddle years ago and as a result of which has not deteriorated at all since). The third paddle I'm repairing is a fiberglass whitewater canoe paddle, recently purchased used from Jimmy MacDonald (he sells new paddles and other paddling stuff so get in touch with him if you need something). As this is a used paddle, it has seen the occasional rock and there was some damage to the edge. I repaired the damage and reinforced the rest of the edges by adding a strip of 4oz cloth to both sides. Both of the wood bent-shaft paddles will receive full varnish, while the whitewater paddle will receive varnish on the repaired areas of the blade to protect it from UV. At the same time I will also add a finish to the greenland paddle I built some time ago. I think I will give that one a tung oil finish.

Thứ Hai, 19 tháng 3, 2007

Waterwalker Film Festival

I could have been working on my bulkheads & more for the last 3 1/2 hours but instead I was updating the web site for the Saskatoon Canoe Club (and now I lost half an hour of sleep to updating this blog). We are hosting the Waterwalker Film Festival this coming weekend so I was adding a detailed schedule and additional sponsors to the web site. I'm also responsible for the audio/visual component of the festival organisation so I have been wrapping up the final details in that respect too.
In other news, it looks like the next couple of evenings will be good in terms of weather for laying up glass on the other side of the bulkheads & cheek plates then epoxying them into place (or should I use structural silicone?).

My garage is insulated but the big double door lets a fair bit of heat out (even though it is insulated) and I don't have a proper heating system installed, relying instead on an electric overhead radiant heater. Actually that heater worked pretty well for glassing the bulkheads the other night since I set them up on a work bench directly underneath the heater with probably a 6 foot distance between heater and object. Although the garage was only about 12C, it was 25C on the bench beside the bulkheads & cheek plates.

Chủ Nhật, 18 tháng 3, 2007

Decisive

Well, after consulting with the online kayak building community I went ahead and got to work. With respect to bulkheads I decided on ......


Cardboard!


OK, not really. The above is a cardboard template being used to determine the exact size and shape needed for the rear bulkhead. The bulkhead position falls between forms 10 & 11 so just using either of those wouldn't quite be right, especially since the shape of the boat changes markedly between those two forms. In order to get the right shape I traced both forms onto a piece of cardboard, ensuring they were precisely aligned. I then cut out the cardboard template to the widest set of lines. Then, by testing the fit in the boat, I kept trimming until it fit well in the space. I then traced that shape onto a piece of 1/8 birch plywood and cut that out with a jig saw then checked it for fit in the boat. It had to be trimmed somewhat but eventually I ended up with a good fit. The same basic process was done for the front bulkhead except in that case the location is close to a form so that became my starting point for the template.

Again, cardboard templates were used to determine the size & shape of the cheekplates (another decision I made since last post - I decided that putting them in was just as easy as making and installing the padeyes that would be needed to hold the backband up). In this case, two overlapping pieces of cardboard were cut and put into position, then held together with a spring clamp. Thus, not only is the proper length determined but also the precise top and bottom angles required to fit the space. Once cut out of the plywood, a 1/4" x 1" slot was cut (by drilling a series of 1/4" holes and filing out the rest) into the cheekplate for the backband webbing to pass through.

I then laid out the newly cut pieces and glassed them before calling it quits for the night.

In the morning, I filled the weave with a second coat of epoxy and tonight I will trim the pieces from the excess glass. I may glass them on the other side tonight yet, or I may wait a couple of days since the temperature outside is dropping (-9 right now and -19 forecast overnight, with 50 km/hr wind gusts) and it will take more $$ to maintain a warm garage for the epoxy to cure.

Thứ Sáu, 16 tháng 3, 2007

Decision, Decisions

Minicell foam for rear bulkhead, or a panel of strips, or a piece of plywood?
Minicell is easy & flexes so avoids creating a rigid spot in the hull. Minicell is expensive and the stuff I have on hand could perhaps be put to better use elsewhere. A panel of strips would look good to match the rest of the kayak, but needs to be glued up from leftover strips & glassed both sides then cut to just the right size & shape to install. Plywood (1/8" birch is what I have on hand) would look OK, matching the coaming and the front portion of the boat, but would have the same issues of getting a good fit (maybe not a big deal) and should probably be glassed on at least one side. Either of the wood options would provide extra support for when sitting on the deck. The front bulkhead will be plywood and will epoxied in place because I intend to use the front bulkhead as the support for a minicell foam footbrace (adjustable with spacers). Right now, I think I'm leaning towards the plywood option. A very low priority bonus of the birch ply is that it would give a nice light background upon which I could add a signature (built by me, 2005-2007, etc.). I also have to decide whether to glass both bulkheads in, or use silicone to install them as Vaclav describes.

Cheek plates (hip braces, butt plates) or not?

Cheek plates are pieces of wood installed vertically beside the seat in the cockpit. They serve to take up the slack which is helpful for getting a good fit in the boat and helps with rolling. They also serve as an attachment point for the backband. In his book, Nick recommends them. However, it's pretty tight in there already and a little minicell foam could probably serve the bracing function well. The backband could in turn be supported by a couple of padeyes located under the deck beside the coaming. Last night I decided that I was going to omit the cheek plates but now I'm thinking of putting them in, mainly for the purpose of backband attachment. Like the bulkheads, these can be made of a panel of glass-reinforced strips or a piece of glass-reinforced birch plywood. Oh what to do, what to do.

Paddle park or not?
I had originally planned on installing a paddle park beside the cockpit but am now considering leaving it off in the name of simplicity. The paddle park is a hook and bungee that provides a place to put the paddle without having it float away (see Pedro's version here). I'm thinking now a loop of bungee running between a couple of the padeyes on the bow would serve a similar function. I have already carved a hook out of mahogany so to install the paddle park I need to epoxy that hook onto the hull and also drill a couple of holes for the bungees (which actually involves drilling an over-sized hole, filling with thickened epoxy, then re-drilling a hole through the cured epoxy for the bungee to pass through with a tight fit).

If you have any insight or comments, please let me know! (Use the post a comment link below.)

I am hoping to do some epoxy work this weekend (I hope the weather warms some more). I need to epoxy the mobies into place under the hatch covers and epoxy a mahogany padeye onto each hatch lid. Depending on the decisions I make regarding the above, I need to glass one or two pieces of birch for the bulkheads, and a couple of pieces for the cheek plates, then epoxy each into place. If I use the paddle park (and after reading some of the comments regarding Glen's & Pedro's paddle parks linked above, I think maybe I should), then I should drill the holes for the bungee cords and fill with thickened epoxy and epoxy the hook in place.

Thứ Ba, 6 tháng 3, 2007

The To Do List

I've created another version of the To-Do list. For earlier versions of the list go here, or here, or here.

Kayak To-Do List
1. Sand inside seam
2. Install mobies
a. Mark location
b. Mask surrounding area
c. Cut patches of glass cloth for reinforcement
d. Epoxy in place with thick epoxy & fillets overlayed with glass cloth
3. Build & install cheek plates
4. Build & install bulkheads
5. Build & install bulkhead footbrace
6. Install paddle park
a. Drill holes for paddle park bungee
b. Fill with thickened epoxy
c. Re-drill holes
d. Attach hook with thickened epoxy
e. Install bungee (after varnish)
7. Install backband
8. Carve seat from minicell foam
9. Wet sand epoxy
10. Varnish
a. Wet sand
b. Varnish
c. Wet sand
d. Varnish
e. Rub to a gloss
11. Install soft padeyes
12. Install deck lines
13. Install bungees into mobies
14. Install weather-stripping into hatch seal channels
15. Carve & install handles/grab loops for bow & stern
16. See if it floats

Thứ Hai, 5 tháng 3, 2007

Boatbuilding Workshop Review

The Saskatoon Canoe Club boatbuilding workshop held on Feb 3rd was a great success if I do say so myself. We had a turn-out of approximately 25 people which was a nice number for the space. We could have coped with 35 or so people but beyond that things would start getting crowded. Thank you to Heather for allowing me to post some of her photos here. For more photos, visit the Kisseynew Canoe Company web site, and Warren Long's album. The event was attended by experienced builders, aspiring builders, struggling builders and paddlers of all sorts. We even had 50% of the famous rockabilly band, Five Star Homeless.

The photos below are all taken by and courtesy of Heather Dunning. For the larger versions and more photos, view the full album on the Kisseynew Canoe Company web site..

Above: Yours truly welcoming participants and introducing the first speaker of the day. My kayak can be seen hanging in the upper left.


Above: Carl describes aspects of building his Waters Dancing stitch & glue kayaks.

Above: I am introducing Jesse who told us about some of the more challenging aspects of building a skin-on-frame baidarka.


Above: Martin & Gordon (?) of Kisseynew Canoe Company demo steam bending stems. That's a pair of record-breaking paddlers you are looking at by the way.

Above: Martin demonstrates fiberglass & epoxy techniques. Martin was incredibly well prepared and had built a panel to demonstrate (from right to left) wet-out of the glass cloth, filling the weave, and applying a 3rd coat of epoxy.

Thank you to everyone for coming, to Martin Bernardin & Kisseynew Canoe Company for hosting the event, and to Jesse, Carl & Martin for teaching us all a few things. The presentations were interesting and informative. Thanks especially to Heather for baking cookies!