There will be times where you want to use a profile to create a swept form; this was reasonably easy to do pre Revit 2010, but the CDE has caused some confusion. So I am going to briefly describe how to use a mass family as a profile and then load this into another mass family and then host the profile to create a swept form or a simple extrusion using the nested profile. This is the start of multi stage tutorial and although I am undertaking this in Vasari the technique works just as well in full Revit's massing environment..
In Vasari start a new project. Next set one of the vertical workplanes to be your current workplane to draw on.
Next using a model line, draw a line on that current workplane.
After drawing the model line, choose the point tool and host a point on the model line. You will notice that the line will snap to the line and once hosted, you can drag the point back and forth along the line.
Next do a crossing selection to pick up the hosted pointed. We need to change the “show reference plane” parameter settings of the point from “when selected” to “Always”
Ok, with this part completed, start a new mass.rfa and choose metric mass.rfa or imperial mass.rfa.
You will now draw a simple closed profile on reference level 1, using model lines, as indicated in the image below.
Save the family and then load this into your already open project with a line and hosted point.Having loaded the family into your project you will discover your profile will be attached to your mouse pointer. We now need to get the profile on the workplane of the hosted point.
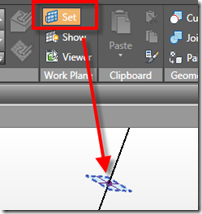
To do this, choose set work plane and pick the workplane of the hosted point. The profile will then flip around so that it is in the same orientation as the hosted pointed.
Place the profile on the hosted points as indicated in the image below.
Once you have placed the profile, select the model line and the profile you just placed.
Then choose “create from” the Ribbon, this will sweep the profile along the path.
With this basic knowledge you can start to get clever with your nested profiles. In this example I have a combination of profiles with different sizes.
In the next part of this tutorial I will show you how to combine this technique with the use of cut and join geometry to create a complex geometric form.


Không có nhận xét nào:
Đăng nhận xét