
Hiển thị các bài đăng có nhãn Stripping. Hiển thị tất cả bài đăng
Hiển thị các bài đăng có nhãn Stripping. Hiển thị tất cả bài đăng
Thứ Ba, 22 tháng 11, 2011
What A Great Stripper!
I found this today via Twitter on Water Fun Cartoons. It's a web site with a weekly paddling cartoon so go check them out. This one's for the boatbuilders:


Thứ Hai, 28 tháng 7, 2008
Stapleless Boat Building
Today Glen posted on the Kayak Building Bulletin Board a link to photos from the recent joint WCHA reunion and Bear Mountain Rendezvous 2008. Going through a few of those photos, something caught my eye (aside from many beautiful wooden boats). It was a series of photos that depicted a novel method of securing strips for stapleless building. Building with wood strips requires that the strips be held tightly to adjacent strips while the glue dries, and to the station mold for the duration of the stripping. 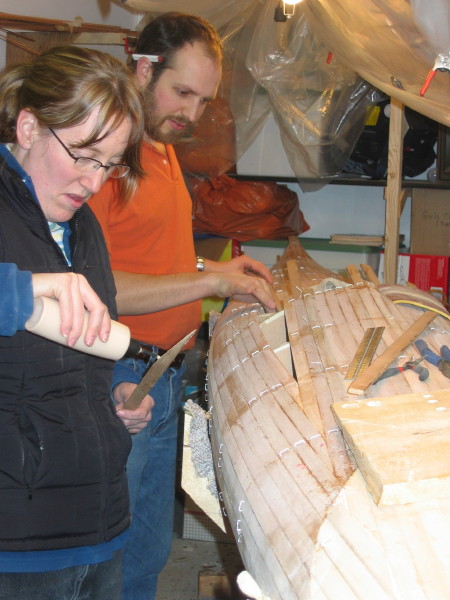 Typically, staples are used to achieve this. Staples are fast and effective, but they do leave behind a row of little holes at each station. Many builders use clamps, jigs, tape and bungee cord (or all of the above) to hold the strips in place while building.
 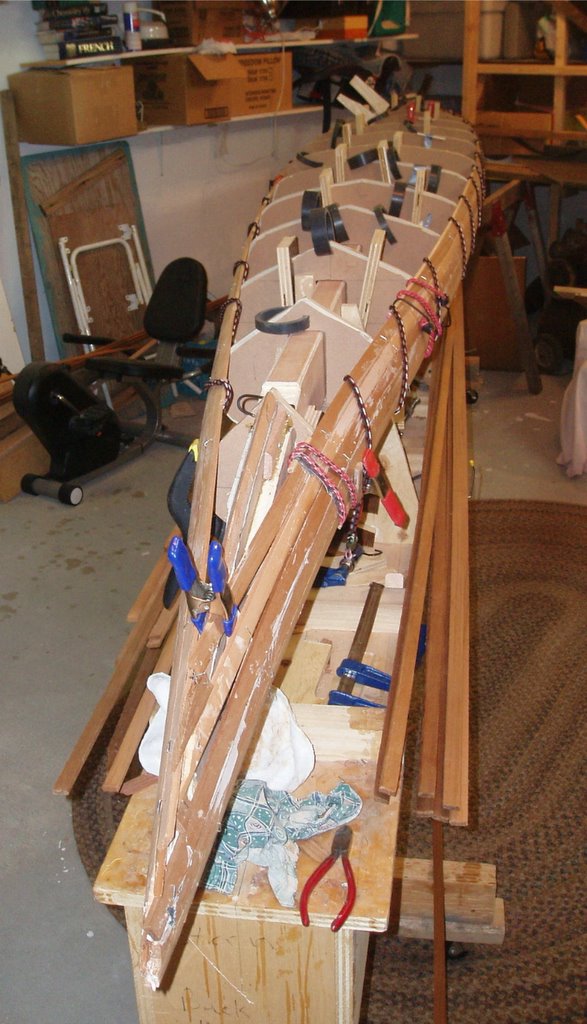 I tried this initially while building the Guillemot, but I decided to revert to staples in the name of speed and efficiency. The method shown in Glen's photos from the BM Rendezvous uses a wire device attached to bungee to hold the strips down against the previous strips, the bungee is tightened using a chain that can be hooked to the right length to the strongback. Meanwhile, a strap which goes around each form keeps the strips tight to the forms. This latter component seems to solve one of the perpetual problems of some stapleless methods which would allow the joined strips to move away from the forms. In areas such as at the bow of the Guillemot kayak which have a concave curve, wedges would probably be needed to maintain the pressure to hold the strips tightly to the forms.
The straps and jigs are being assembled and sold as a kit by Ron Frenette of Canadian Canoes. The kits are pricey ($375) but seem like a pretty slick system for building a fine piece of woodcraft.

 Typically, staples are used to achieve this. Staples are fast and effective, but they do leave behind a row of little holes at each station. Many builders use clamps, jigs, tape and bungee cord (or all of the above) to hold the strips in place while building.
  I tried this initially while building the Guillemot, but I decided to revert to staples in the name of speed and efficiency. The method shown in Glen's photos from the BM Rendezvous uses a wire device attached to bungee to hold the strips down against the previous strips, the bungee is tightened using a chain that can be hooked to the right length to the strongback. Meanwhile, a strap which goes around each form keeps the strips tight to the forms. This latter component seems to solve one of the perpetual problems of some stapleless methods which would allow the joined strips to move away from the forms. In areas such as at the bow of the Guillemot kayak which have a concave curve, wedges would probably be needed to maintain the pressure to hold the strips tightly to the forms.
The straps and jigs are being assembled and sold as a kit by Ron Frenette of Canadian Canoes. The kits are pricey ($375) but seem like a pretty slick system for building a fine piece of woodcraft.
Chủ Nhật, 19 tháng 3, 2006
Cockpit recess stripped
Well I finally got a bit of time to do some more work on the boat this weekend. I finished stripping the recessed cockpit area. Short strips were glued in place with the Lee Valley 2002 GF wood glue that I've used for most of the boat, but dabs of hot glue were used on the inner end of each piece to hold it in place so that I didn't have to wait for the glue to dry before moving on to the next series of strips. Dabs of hot glue were used here and there in other places too to ensure that all the short strips stayed where they were put. The whole recess took an ridiculous amount of time for something so simple. Next time I think I would seriously consider laying in a piece of thin, flexible plywood instead.
 Stern to bow shot:
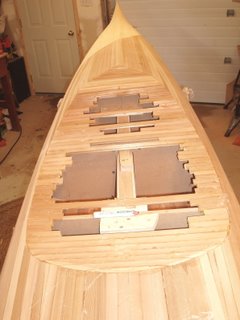
Bow to stern shot: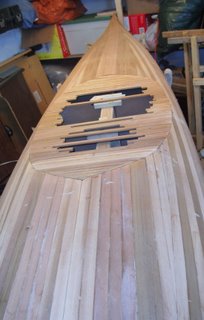
Side profile: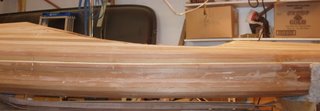 The above photo shows how the recessed area lowers the final cockpit position, especially on the rear deck.
Finally, a frankensteinian panorama:
 That's it the deck is practically finished right??....... (stay tuned to see what's in store next)
p.s. If anyone can tell me how to quickly do a passable job of adjusting the colours in a digital photo to have things look a little bit realistic, I'm all ears. I play with the colour balance, gamma, tone, brightness, contrast and that thing with the curve that does wicked things to a photo, with limited success at best. I've got all the tools, I know how to turn them on, but I don't properly understand what they do or when to use them. Most of my shop pictures turn out too orange maybe due to the colour of the wood and a light source with a warm tone as seen by the camera.
 Stern to bow shot: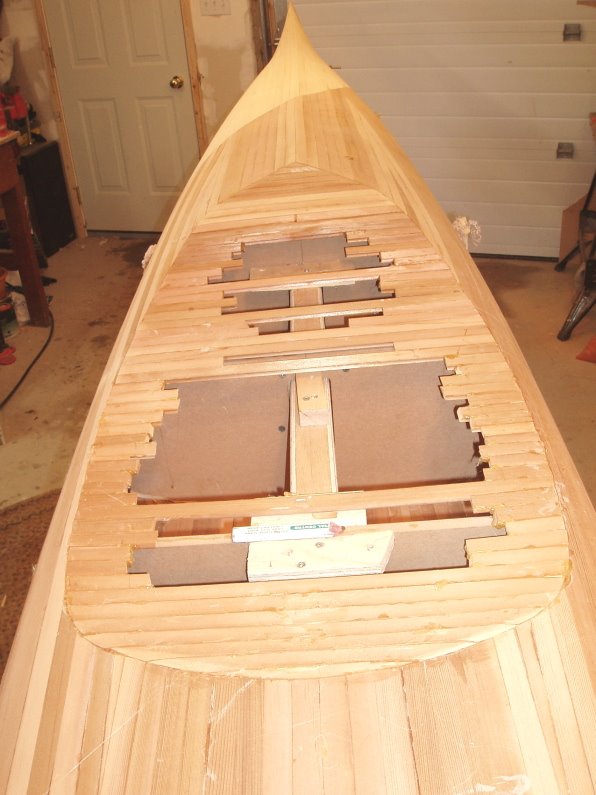
Bow to stern shot:

Side profile:
 The above photo shows how the recessed area lowers the final cockpit position, especially on the rear deck.
Finally, a frankensteinian panorama:
 That's it the deck is practically finished right??....... (stay tuned to see what's in store next)
p.s. If anyone can tell me how to quickly do a passable job of adjusting the colours in a digital photo to have things look a little bit realistic, I'm all ears. I play with the colour balance, gamma, tone, brightness, contrast and that thing with the curve that does wicked things to a photo, with limited success at best. I've got all the tools, I know how to turn them on, but I don't properly understand what they do or when to use them. Most of my shop pictures turn out too orange maybe due to the colour of the wood and a light source with a warm tone as seen by the camera.
Thứ Hai, 6 tháng 3, 2006
Lack of Progress
Kayak progress has been pretty much stopped lately. Between sickness (the whole family seems to be just continuously cycling through colds), work, and getting our house ready to sell I haven't done a thing on the boat in about 2 weeks. We bought a house last week (20'x24' attached garage with 10' ceilings, insulated and drywalled - I need to add lots of light, lots of power, a source of heat and I'll have a boatbuilding shop ready to go) so now I have to finish all sorts of things around our house and get it ready to sell. We've gotten a lot done on that front over the last couple of weekends so the list is getting shorter. Then I'll have to clean up the shop and make it presentable. By the way, if you want to buy a boatbuilding workshop (220V, lots of light, electrical outlets every 6', insulated, drywalled) with nice yard and detached house, let me know!
As you see it in my previous posts is pretty much how the kayak sits right now. I'm not in super big hurry right now anyway since the next few steps involve epoxy so I'll have to warm it up and keep it warm for a period. Thus, I want to wait until it's a bit warmer outside and also where I can do a lot of work on it in a single stretch. Aside from the actual fiberglass work, I need to fill all the gaps and I'll use a epoxy putty mixture to do that with. I also need to attach hardwood stems which will be glued in place with epoxy (though I could use a polyurethane glue or another glue).
Right now I'm 1/3-1/2 way through filling in the cockpit recess, a flatish area (curves in only 2 dimensions instead of 3) where the cockpit hole will eventually be cut and it's proving to be a PITA because it takes time to properly fit all the short horizontal strips just so without a gap. I was considering using a chunk of thin plywood (walnut or mahogany or luan?) and bending it in place to fill the recess much as would be done for a stitch & glue kayak, but I decided to do it the way the book said since I am too cheap to go buy plywood and preferred to use up my scraps of cedar. Now I'm wishing I had used the plywood. If I had gotten the ply, I would also use it for the whole cockpit area including the riser and the rim (there is a lip that sits above the cockpit opening about an inch which allows you to attach a spray skirt and also keeps the water out when not using the skirt). I'm still thinking about plywood - I think mahogany/luan might look OK with the cedar, and I think in the end it would be lighter, maybe stronger, and easier. (I just called around & I can get a 4x8 sheet of 1/8" ribbon mahogany for $19 - I think I'm sold but I'll have to see what it looks like and how flexible it is). Once the recessed area is finished, sanded and all the gaps filled (filled for two reasons - aesthetics and so that they don't just fill with plain epoxy during glassing which would add weight) I'll fiberglass the deck then flip it over to work on the bottom. I already had it flipped over and was working on the stems and have the bottom half smoothed, but the deck flexed a lot because it wasn't being properly supported and I think it would be better to have the deck strengthened with fiberglass before I flip it over again. Either that or I have to make some cradles to better support the deck while it's upside down (my cradles are shaped to fit the bottom - probably just the webbing slings of my boat stands will work too without creating pressure points). By spring I should have a boat that floats but doing the finish work will take some time too (seat, back rest, hip padding, deck lines, varnish).
So here is what I have yet to do in approximate order, though that may change:
As you see it in my previous posts is pretty much how the kayak sits right now. I'm not in super big hurry right now anyway since the next few steps involve epoxy so I'll have to warm it up and keep it warm for a period. Thus, I want to wait until it's a bit warmer outside and also where I can do a lot of work on it in a single stretch. Aside from the actual fiberglass work, I need to fill all the gaps and I'll use a epoxy putty mixture to do that with. I also need to attach hardwood stems which will be glued in place with epoxy (though I could use a polyurethane glue or another glue).
Right now I'm 1/3-1/2 way through filling in the cockpit recess, a flatish area (curves in only 2 dimensions instead of 3) where the cockpit hole will eventually be cut and it's proving to be a PITA because it takes time to properly fit all the short horizontal strips just so without a gap. I was considering using a chunk of thin plywood (walnut or mahogany or luan?) and bending it in place to fill the recess much as would be done for a stitch & glue kayak, but I decided to do it the way the book said since I am too cheap to go buy plywood and preferred to use up my scraps of cedar. Now I'm wishing I had used the plywood. If I had gotten the ply, I would also use it for the whole cockpit area including the riser and the rim (there is a lip that sits above the cockpit opening about an inch which allows you to attach a spray skirt and also keeps the water out when not using the skirt). I'm still thinking about plywood - I think mahogany/luan might look OK with the cedar, and I think in the end it would be lighter, maybe stronger, and easier. (I just called around & I can get a 4x8 sheet of 1/8" ribbon mahogany for $19 - I think I'm sold but I'll have to see what it looks like and how flexible it is). Once the recessed area is finished, sanded and all the gaps filled (filled for two reasons - aesthetics and so that they don't just fill with plain epoxy during glassing which would add weight) I'll fiberglass the deck then flip it over to work on the bottom. I already had it flipped over and was working on the stems and have the bottom half smoothed, but the deck flexed a lot because it wasn't being properly supported and I think it would be better to have the deck strengthened with fiberglass before I flip it over again. Either that or I have to make some cradles to better support the deck while it's upside down (my cradles are shaped to fit the bottom - probably just the webbing slings of my boat stands will work too without creating pressure points). By spring I should have a boat that floats but doing the finish work will take some time too (seat, back rest, hip padding, deck lines, varnish).
So here is what I have yet to do in approximate order, though that may change:
- Fill in the cockpit recess whether with strips or plywood.
- Fill the gaps in the deck.
- Cut a 4" hole in the deck in front of the cockpit and insert a hand-carved feature piece inlay (which is almost complete but isn't quite there yet).
- Seal the deck with epoxy (might be done shortly before fiberglassing).
- Fiberglass the deck top with 4 ounce glass.
- Flip the boat over into the boat stands with webbing.
- Bend strips of walnut to form the the keel strips & glue in place. (I've already got the strips cut and bent using a heat gun, but I have to decided if they are good enough)
- Plane, scrape, sand the bottom and fair the keel strips into the hull.
- Fill the gaps.
- Precoat then fiberglass the bottom (multiple layers).
- Flip the boat back over.
- Cut out the cockpit opening.
- Build the cockpit riser (short strips of cedar or a piece of plywood)
- Fiberglass the riser.
- Build a cockpit lip (by laminating thin strips of hardwood or cutting the lip out of plywood), trim the riser above the lip and smooth the edges.
- Fiberglass the lip.
- Pull the deck and hull off of the forms.
- Scrape, plane and sand the inside of the kayak fair.
- Fiberglass the inside, reinforcing certain areas.
- Cut hatch openings.
- Install fittings for deck lines.
- Attach the two halves.
- Install bulkheads.
- Apply the epoxy fill coats to fill the weave of the fabric.
- Varnish
- Build and install seat, back rest.
- Install deck lines.
- Paddle.
Thứ Sáu, 17 tháng 2, 2006
A Boat With A Hole In It
On Wednesday night I got the deck planed and sanded fairly smooth (fair) and also cut out the hole for the recessed cockpit. (To see what the cockpit recess on this kayak should look like, have a look at the one John Caldeira did on his, it's a great excuse to have a look at his beautiful Guillemot kayak.)
The line was first marked onto the deck in pencil following a half template cut from 1/8" hardboard. A half-template is a template which is only half of the opening and is then flipped over to do the other half. This helps to assure that the two sides are actually symmetrical and prevents the appearance of any errors in the way the curves are drawn between the two sides (the template is drawn from a set of "offsets which are essentially a series of x & y coordinates then you connect the dots to get the full shape). I was initially a bit timid about how to get the flat template to lay properly on the deck which is highly curved in in this particular spot. Should I push it down and force it to conform to the shape of the deck as best I can, or allow it to sit flat and just trace straight down from the edge of the template, even though it may sit 5" or more above the kayak in places. I eventually decided it probably doesn't matter too much and stapled the template down to the deck in a couple of spots to ensure it didn't shift on me, curving it to follow the contour of the deck somewhat but not forcing it down anywhere. I then held my pencil fairly vertical and traced around the template. I then flipped it over and repeated for the other side.
 The hole was cut just slightly to the inside of the line, to be trimmed to the line later with sandpaper, chisels, etc. The cut was started using a broken off hacksaw blade clamped in vice grips. This narrow blade allowed for a very thin kerf and was able to cut a fairly tight radius around the corner. Once around the corner at the back of the cockpit, I switched to the japanese pull saw (shown in the pictures) to cut the more gently curving portions.
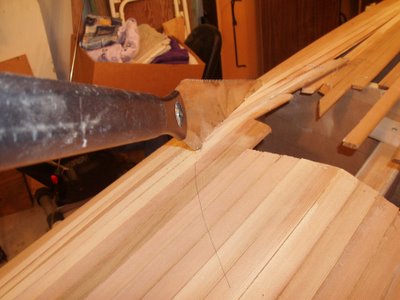 The hacksaw blade in vice grips saw worked OK, but it wasn't terrific. Also the japanese saw worked well, but wouldn't work for anything more than a gentle curve. Cutting the recess (and later the actual cockpit opening) is a trial in advance of cutting hatch openings later on. Cutting the hatches will require something able to cut a smooth line and follow a curve well. Often a power jig saw is used, but I have some misgivings about using my hand-me-down 30 year old saw for this purpose, or any other power tool for that matter. In my experience, nothing screws up a project faster than trying to save a bit of time using a power tool. I think then, that this little saw (or this one) from Lee Valley Tools might be just the ticket.
 It would allows for a thin kerf, the fine and easy cut of a japanese saw, and it's narrow and would have no problem cutting the oval shape of a hatch. At $18 it's not prohibitive either. I think I will get this saw now, but I just wanted to rule out a couple of options first (one more option to try would be to use a fine tooth jigsaw blade in the vicegrips). I also think small saw like this would have been handy for rough cutting strips while stripping the kayak.
Here are a couple more photos of the cut out cockpit recess.

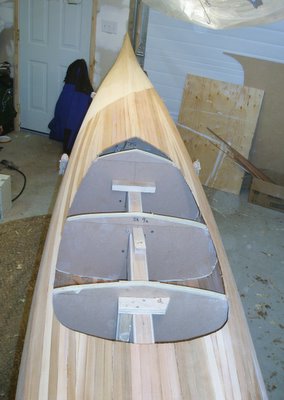 Looks nicer with a hole in it doesn't it?
Now I have to fill that hole back in, at least partially so that there is a couple of inches worth of wood all the way around the outer edge. The difference from what was cut out is that the pieces that are put in will go in horizontally across the opening such that they sit parallel to the floor on a flat curve from the peak at the front to the sides where it is lowest then up just a bit at the back (that second last picture above should help to visualize this). The tops of the forms in the recess area have now been broken away (they were pre-cut then hot-glued back in place prior to stripping) so that they are out of the way for the building of the recess. Once that recess has been stripped, I can cut out the hole for the actual cockpit opening (actually that probably won't occur until after the deck has been glassed on the outside).
After I had planed off the high points, I started up the sander with 80 grit paper just to see how that goes. I never bothered with the dust mask or connecting the shop-vac up to collect the dust because I was only going to be sanding for a couple of minutes. Well I ended up doing a fair bit of sanding, the whole deck in fact. It took me about an hour or so. I figured there wasn't much dust being kicked up so I didn't worry about the mask, even though I know that wood dust isn't very good for the lungs, and cedar dust is the worst. After being at it for a while I looked up across the room and realised that the air was full of dust. When I went to bed later that night I began to hack and cough, and it got worse the next day. 48 hours later and I think I'm nearly back to normal (I am/was on the tail end of a cold so it is a bit difficult to say what's due to dust and what's due to virus). Of course the next day in the lab Justin, a lung function specialist with whom I share lab space, noticed the hacking cough and after my explanation admonished me for my foolishness. He's right of course. Ever wonder why people use cedar chests to store quilts and long term clothes storage, or use cedar inserts in dresser drawers to ward off insects? It's because cedar trees have gotten very good at producing chemicals that some insects aren't particularly fond of. And your lung epithelial lining isn't particularly fond of it either. Even without the toxic compounds, it's probably not particularly good to have these extremely fine fibers (the small size of the dust allows them to get into the deepest cavities of your lungs) irritating your alveoli (remember, Justin's the expert on that stuff not me). But (cough) I digress.

The line was first marked onto the deck in pencil following a half template cut from 1/8" hardboard. A half-template is a template which is only half of the opening and is then flipped over to do the other half. This helps to assure that the two sides are actually symmetrical and prevents the appearance of any errors in the way the curves are drawn between the two sides (the template is drawn from a set of "offsets which are essentially a series of x & y coordinates then you connect the dots to get the full shape). I was initially a bit timid about how to get the flat template to lay properly on the deck which is highly curved in in this particular spot. Should I push it down and force it to conform to the shape of the deck as best I can, or allow it to sit flat and just trace straight down from the edge of the template, even though it may sit 5" or more above the kayak in places. I eventually decided it probably doesn't matter too much and stapled the template down to the deck in a couple of spots to ensure it didn't shift on me, curving it to follow the contour of the deck somewhat but not forcing it down anywhere. I then held my pencil fairly vertical and traced around the template. I then flipped it over and repeated for the other side.
 The hole was cut just slightly to the inside of the line, to be trimmed to the line later with sandpaper, chisels, etc. The cut was started using a broken off hacksaw blade clamped in vice grips. This narrow blade allowed for a very thin kerf and was able to cut a fairly tight radius around the corner. Once around the corner at the back of the cockpit, I switched to the japanese pull saw (shown in the pictures) to cut the more gently curving portions.
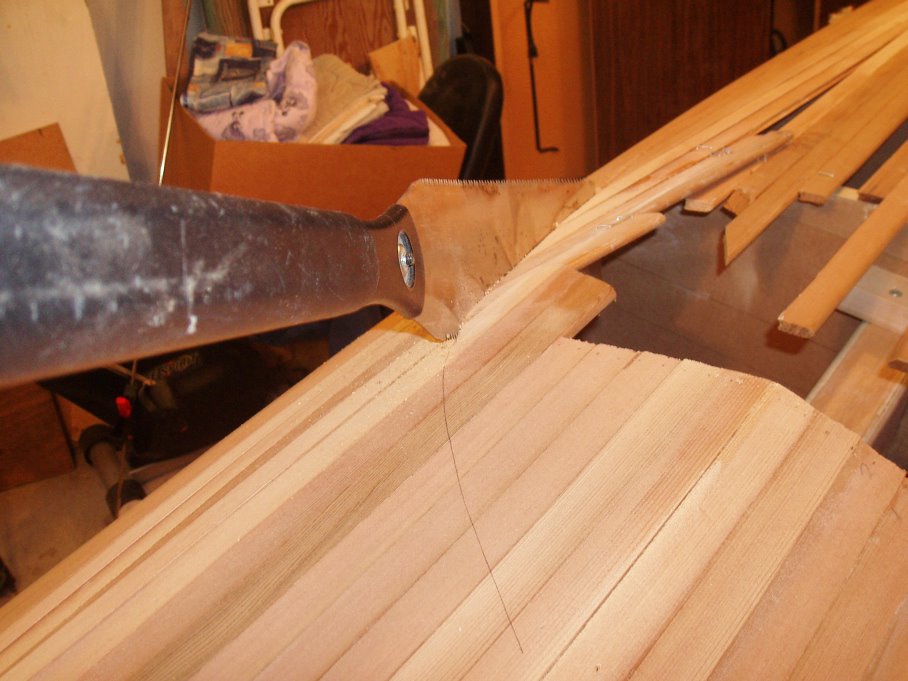 The hacksaw blade in vice grips saw worked OK, but it wasn't terrific. Also the japanese saw worked well, but wouldn't work for anything more than a gentle curve. Cutting the recess (and later the actual cockpit opening) is a trial in advance of cutting hatch openings later on. Cutting the hatches will require something able to cut a smooth line and follow a curve well. Often a power jig saw is used, but I have some misgivings about using my hand-me-down 30 year old saw for this purpose, or any other power tool for that matter. In my experience, nothing screws up a project faster than trying to save a bit of time using a power tool. I think then, that this little saw (or this one) from Lee Valley Tools might be just the ticket.
 It would allows for a thin kerf, the fine and easy cut of a japanese saw, and it's narrow and would have no problem cutting the oval shape of a hatch. At $18 it's not prohibitive either. I think I will get this saw now, but I just wanted to rule out a couple of options first (one more option to try would be to use a fine tooth jigsaw blade in the vicegrips). I also think small saw like this would have been handy for rough cutting strips while stripping the kayak.
Here are a couple more photos of the cut out cockpit recess.
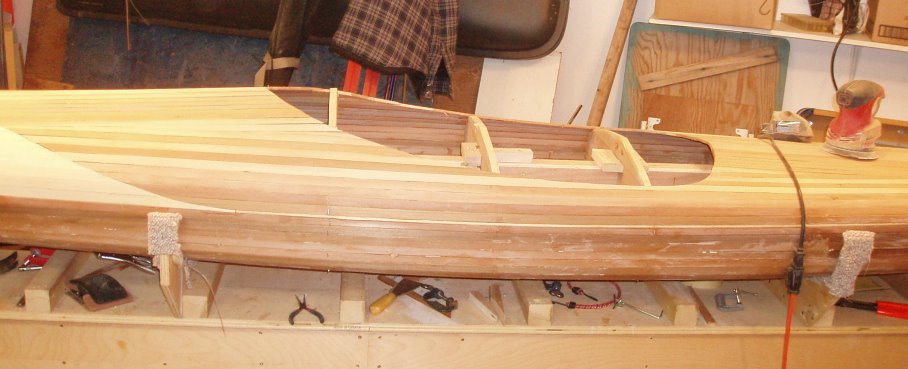
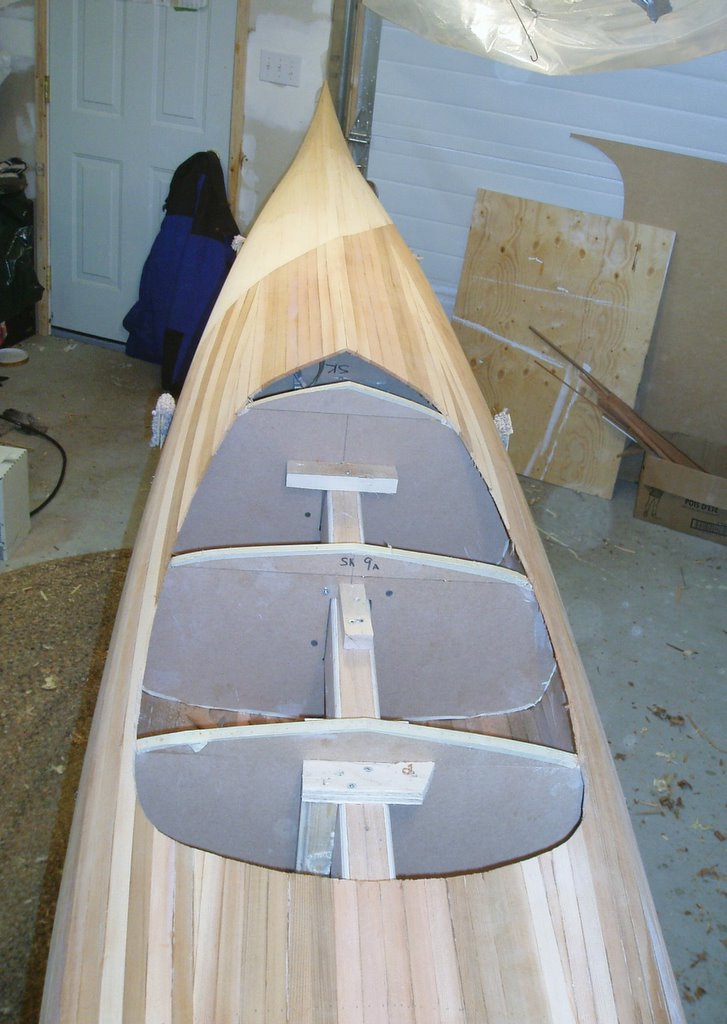 Looks nicer with a hole in it doesn't it?
Now I have to fill that hole back in, at least partially so that there is a couple of inches worth of wood all the way around the outer edge. The difference from what was cut out is that the pieces that are put in will go in horizontally across the opening such that they sit parallel to the floor on a flat curve from the peak at the front to the sides where it is lowest then up just a bit at the back (that second last picture above should help to visualize this). The tops of the forms in the recess area have now been broken away (they were pre-cut then hot-glued back in place prior to stripping) so that they are out of the way for the building of the recess. Once that recess has been stripped, I can cut out the hole for the actual cockpit opening (actually that probably won't occur until after the deck has been glassed on the outside).
After I had planed off the high points, I started up the sander with 80 grit paper just to see how that goes. I never bothered with the dust mask or connecting the shop-vac up to collect the dust because I was only going to be sanding for a couple of minutes. Well I ended up doing a fair bit of sanding, the whole deck in fact. It took me about an hour or so. I figured there wasn't much dust being kicked up so I didn't worry about the mask, even though I know that wood dust isn't very good for the lungs, and cedar dust is the worst. After being at it for a while I looked up across the room and realised that the air was full of dust. When I went to bed later that night I began to hack and cough, and it got worse the next day. 48 hours later and I think I'm nearly back to normal (I am/was on the tail end of a cold so it is a bit difficult to say what's due to dust and what's due to virus). Of course the next day in the lab Justin, a lung function specialist with whom I share lab space, noticed the hacking cough and after my explanation admonished me for my foolishness. He's right of course. Ever wonder why people use cedar chests to store quilts and long term clothes storage, or use cedar inserts in dresser drawers to ward off insects? It's because cedar trees have gotten very good at producing chemicals that some insects aren't particularly fond of. And your lung epithelial lining isn't particularly fond of it either. Even without the toxic compounds, it's probably not particularly good to have these extremely fine fibers (the small size of the dust allows them to get into the deepest cavities of your lungs) irritating your alveoli (remember, Justin's the expert on that stuff not me). But (cough) I digress.
Thứ Hai, 13 tháng 2, 2006
Deck Completed
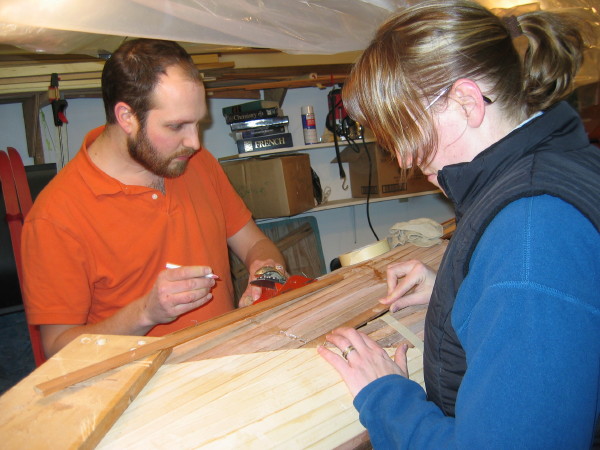
I had some help from my wife last weekend fitting some of the final strips on the kayak deck. Here are a couple of photos of her working on her boat for the first time. 

 Here's a picture of my main helper, Kaya:
I recently set up a tent over the kayak to keep things a bit warmer over the boat without having to keep the whole garage warm. I ran a rope from one corner to the other to hold a plastic sheet over the boat, then ran a string of lights under the tent to throw some heat in the enclosure. Wire hangers with the bottom cut and spread apart are being used to spread the plastic away from the lights (credit for that idea goes to Paul G Jacobsen).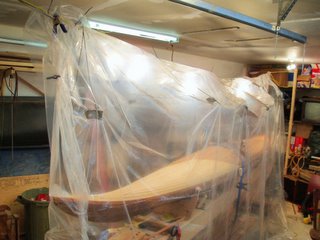 The plastic is sealed up at the ends with a few clips and the lights are plugged in. Six 100 watt bulbs keeps it about 12C under the tent while it is about 0C in the garage (and -15C outside). That's better than keeping the 4800 watt heater on until the glue cures. In order to work on the boat I raise the plastic and fold it up over top of the whole apparatus and add a couple of clips to keep it there. It's not too annoying to work under but if I were any taller I'd want to raise it more. The lights are also helpful to work by.

 The final strips over the deck around what will become the cockpit opening proved to be rather difficult. Those last 4 strips were buggers because they are so short and they twist so much, with not much to actually attach them to. A little heat and lots of bungees, staples, clamps and a couple of nails helped to get them in place and hold them there.
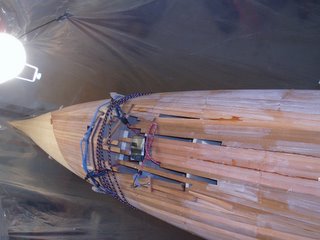
I then pulled most of the staples from the deck. I had a major "Oh Sh*t!" moment when I pulled the last staple from a region of the deck just behind the cockpit. A section three strips wide and ~2 1/2 feet long broke free from the deck along the glue joints, but remained attached on the end. I had been pulling the staples by using a pliers and simply yanking the staples straight out. I hadn't realised that the staples actually had a pretty good hold on the cedar they go through and that hold proved stronger than the glue and wood on the back deck. I was able staple it back down and glue the piece back in place using cyanoacrylate glue (a thick version of Krazy Glue). It should be OK now, but I was more careful removing the rest of the staples, choosing to pry them out with a screwdriver rather than yanking with pliers.
 Here's a couple more pictures with all the strips in place, no bungees or staples.

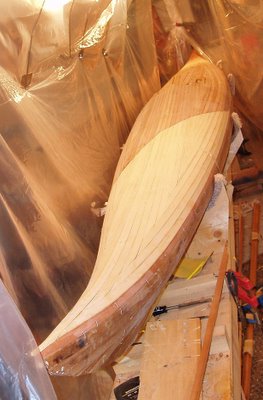
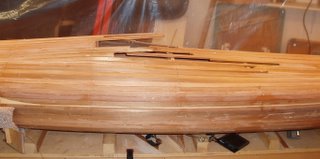
Next, I need to cut out the opening for the recessed cockpit and plane, scrape & sand the deck until it's smooth and fair. Once that's done I'll flip the boat back over and put the hardwood stems onto the ends of the hull then repeat the fairing process on the hull. But, first I have to get over this cold.
 Here's a picture of my main helper, Kaya:
I recently set up a tent over the kayak to keep things a bit warmer over the boat without having to keep the whole garage warm. I ran a rope from one corner to the other to hold a plastic sheet over the boat, then ran a string of lights under the tent to throw some heat in the enclosure. Wire hangers with the bottom cut and spread apart are being used to spread the plastic away from the lights (credit for that idea goes to Paul G Jacobsen).

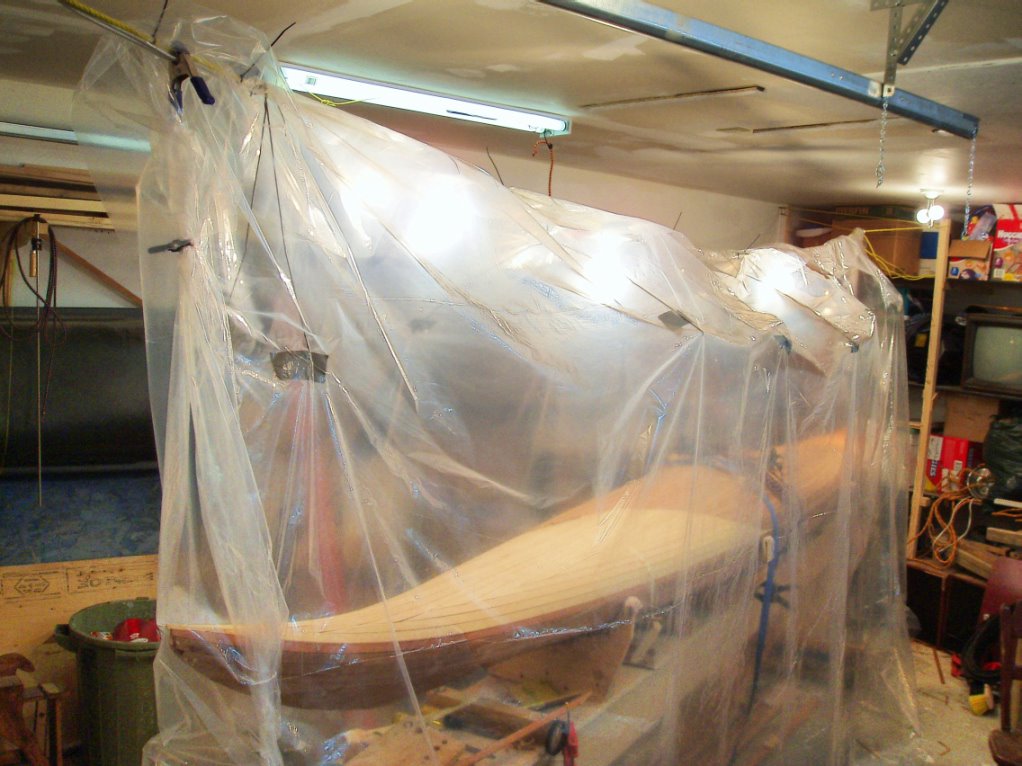 The plastic is sealed up at the ends with a few clips and the lights are plugged in. Six 100 watt bulbs keeps it about 12C under the tent while it is about 0C in the garage (and -15C outside). That's better than keeping the 4800 watt heater on until the glue cures. In order to work on the boat I raise the plastic and fold it up over top of the whole apparatus and add a couple of clips to keep it there. It's not too annoying to work under but if I were any taller I'd want to raise it more. The lights are also helpful to work by.
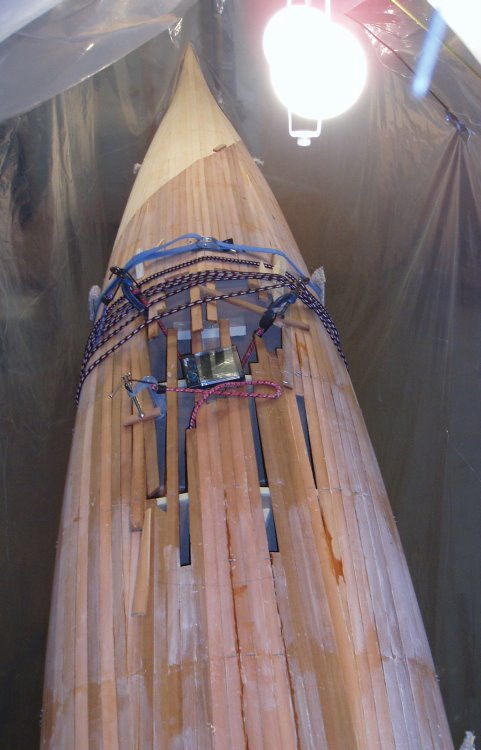 The final strips over the deck around what will become the cockpit opening proved to be rather difficult. Those last 4 strips were buggers because they are so short and they twist so much, with not much to actually attach them to. A little heat and lots of bungees, staples, clamps and a couple of nails helped to get them in place and hold them there.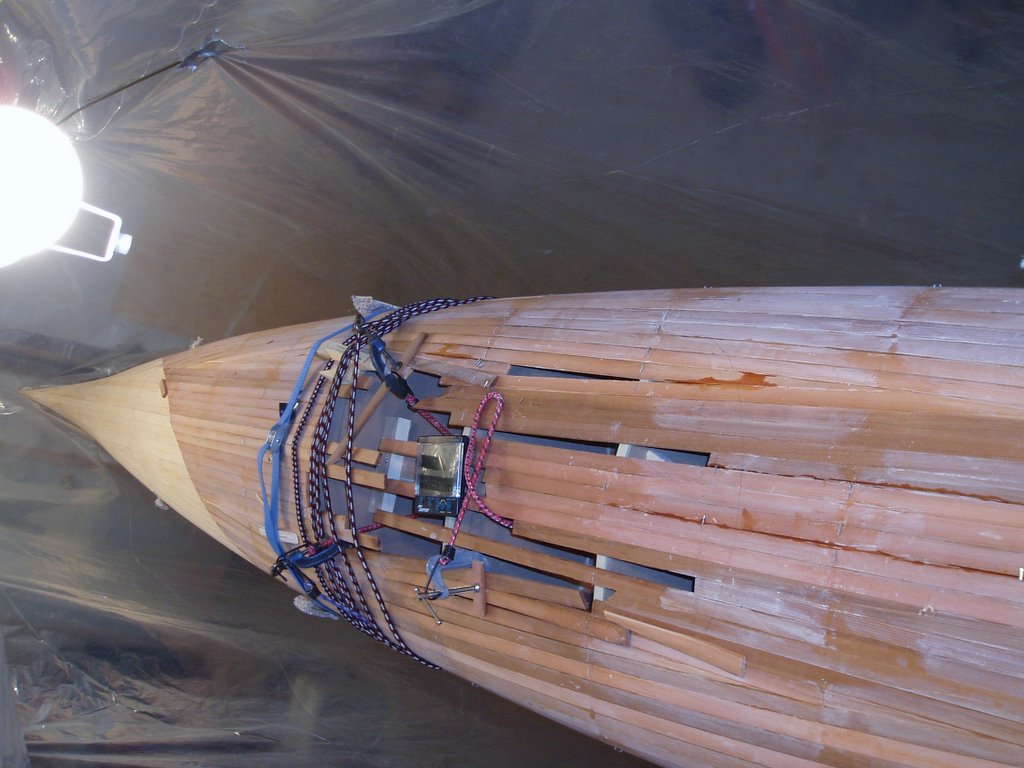
I then pulled most of the staples from the deck. I had a major "Oh Sh*t!" moment when I pulled the last staple from a region of the deck just behind the cockpit. A section three strips wide and ~2 1/2 feet long broke free from the deck along the glue joints, but remained attached on the end. I had been pulling the staples by using a pliers and simply yanking the staples straight out. I hadn't realised that the staples actually had a pretty good hold on the cedar they go through and that hold proved stronger than the glue and wood on the back deck. I was able staple it back down and glue the piece back in place using cyanoacrylate glue (a thick version of Krazy Glue). It should be OK now, but I was more careful removing the rest of the staples, choosing to pry them out with a screwdriver rather than yanking with pliers.
 Here's a couple more pictures with all the strips in place, no bungees or staples.
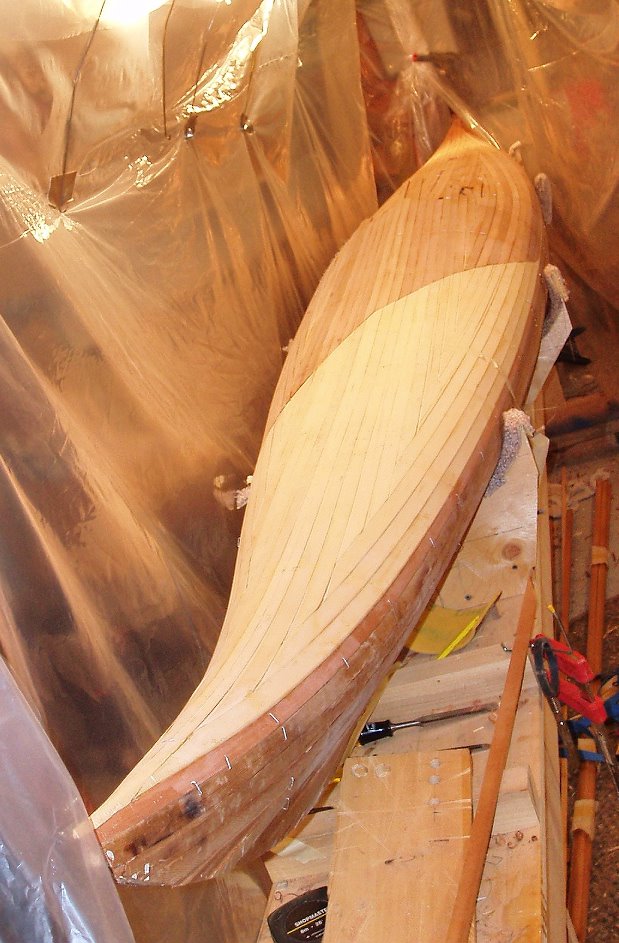
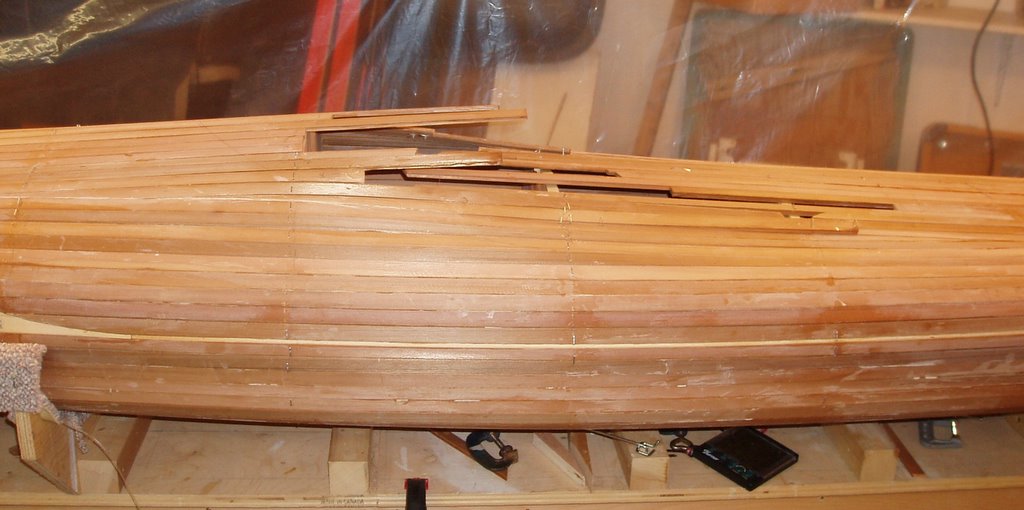
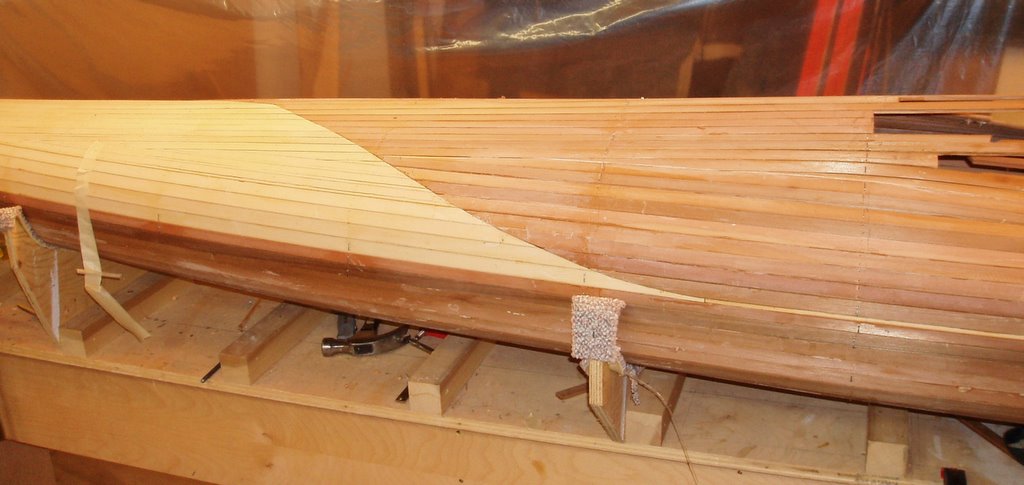
Next, I need to cut out the opening for the recessed cockpit and plane, scrape & sand the deck until it's smooth and fair. Once that's done I'll flip the boat back over and put the hardwood stems onto the ends of the hull then repeat the fairing process on the hull. But, first I have to get over this cold.
Chủ Nhật, 29 tháng 1, 2006
Deck Half Done
I got nearly 4 hours of work done last night so I am now about half done stripping the deck.
 Please excuse the frankensteinian cut & paste panorama.
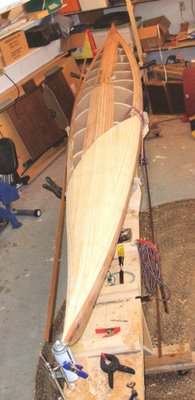
 Please excuse the frankensteinian cut & paste panorama.
Thứ Hai, 16 tháng 1, 2006
Yellow Cedar
The wood I am using for contrast is Yellow Cedar, Chamaecyparis nootkatensis. This wood is a pale yellow in colour, in contrast to the dark brown/red of the Western Red Cedar which makes up the rest of the hull. The name is a bit confusing as it is a cypress rather than a cedar (thanks to Rod for clearing that up for me). When I first started working with yellow cedar I was struck by the difference in smell and working characteristics as compared to the red cedar. I thought they were different varieties of the same thing so I expected some common ground in the wood characteristics. The yellow cedar has a more uniform appearance and texture, and is much less likely to split along the grain as I whittle a taper onto the end of a strip. The most striking difference though (other than appearance) is the smell. I expected something cedar-like in smell but being a cypress rather than cedar the smell is quite different.
The strips of yellow cedar I have (purchased from Orca Boats) are also of a much better quality than the red cedar strips (purchased from some guy off the net). The red cedar strips vary somewhat in thickness and width, and have places on most strips where the cove is not properly cut all the way, or where the bead is off center, or there are bumps along the bead. I gather that some of this is normal, and I did get a pretty good deal on the wood so I'm not dissapointed, but next time I may make my own strips or make use of the fancy new set up of the folks over at Kisseynew Canoe Co.
The strips of yellow cedar I have (purchased from Orca Boats) are also of a much better quality than the red cedar strips (purchased from some guy off the net). The red cedar strips vary somewhat in thickness and width, and have places on most strips where the cove is not properly cut all the way, or where the bead is off center, or there are bumps along the bead. I gather that some of this is normal, and I did get a pretty good deal on the wood so I'm not dissapointed, but next time I may make my own strips or make use of the fancy new set up of the folks over at Kisseynew Canoe Co.
Bow Deck Stripped
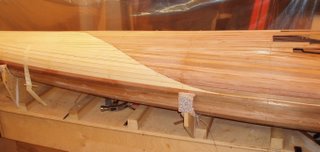
Thanks to all who gave their input into the design for the deck. The design I decided on is something similar to "L" shown in a previous post. Below, I have stripped the deck so that the strips extend beyond what I have decided the border of the contrasting strips will be. To define a fair curve I am using a 1/4" piece of strip which is the bead cut off of one of the strips that was to become the center strips (the bead was cut off so that the strips could be laid on the deck cove outward in the same manner as the keel was stripped). This pattern by the way used up nearly all 114 feet of yellow cedar that I had. It was nip and tuck in the end with 6 feet or less left over.
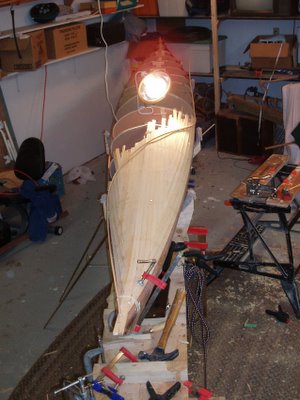
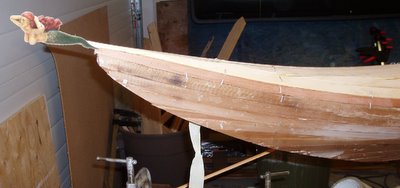
Here I have roughly cut the strips back to the curving line. It still needs to be smoothed out. I might change the curve a little bit to make it a little more curvy but I need to sleep on it.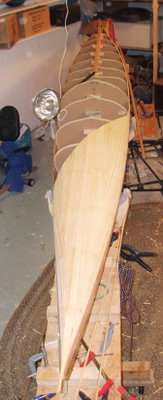 Now that the bow is stripped, how about the addition of a figurehead?
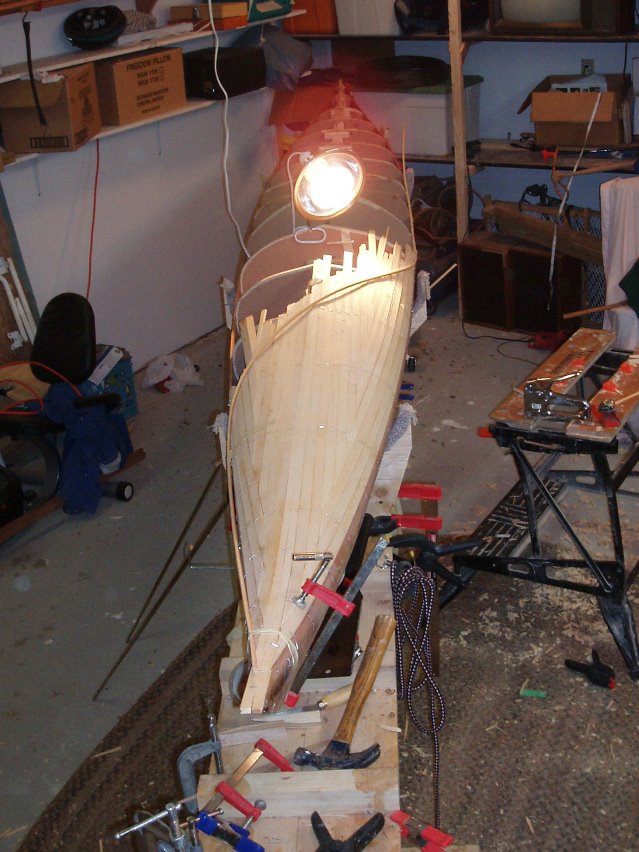
Here I have roughly cut the strips back to the curving line. It still needs to be smoothed out. I might change the curve a little bit to make it a little more curvy but I need to sleep on it.
 Now that the bow is stripped, how about the addition of a figurehead?
Thứ Sáu, 13 tháng 1, 2006
Deck designs & exceeded bandwidth
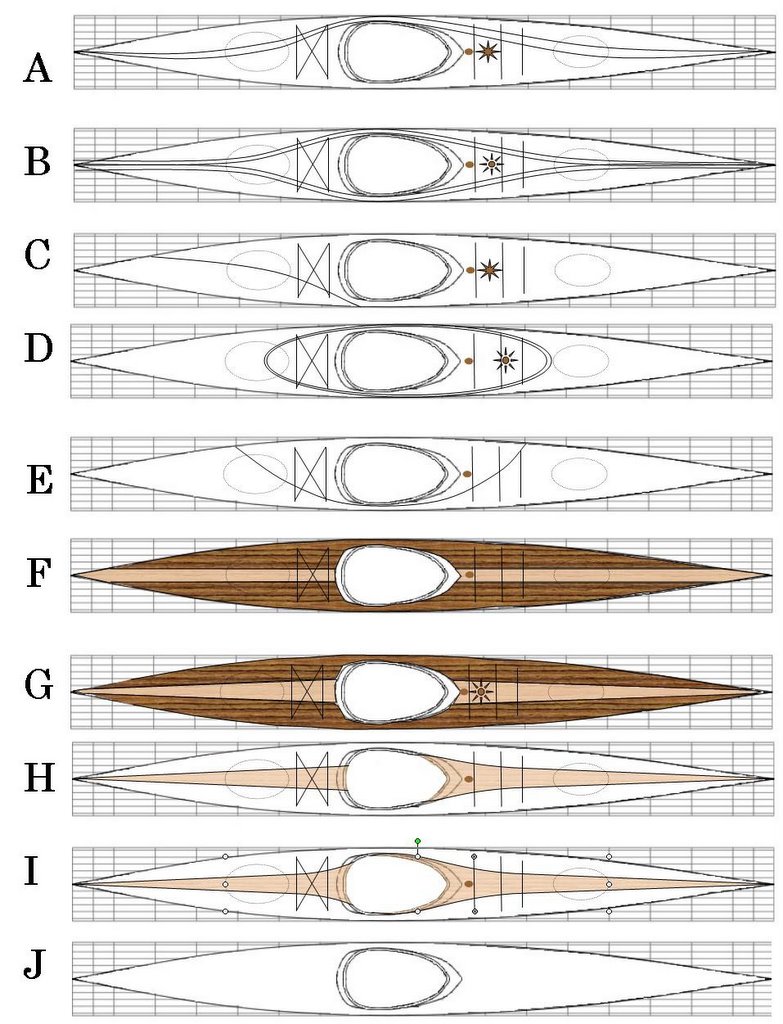

Image troubles! In my previous post I linked to images hosted on my geocities.com site, which allows only 4mb of traffic per hour. That was promptly exceeded. (I think I'll be moving my web site soon.) So now I'll load those images directly to Blogger. The second set of photos were created using the kayak design tool found on the Action Fish Kayaks web site.
Đăng ký:
Bài đăng (Atom)