Thứ Ba, 23 tháng 2, 2010

Point colour in Revit 2010

When working with Points in a conceptual mass sometimes it can be a bit of challenge seeing your points using the default out of the box settings. The default colour is a rather nice purple colour, which is unfortunately  the same colour defined for Reference Lines and Planes.On complex assemblies all these points and reference lines can get rather confusing.

image

So if you are struggling with the the fact that both Reference Lines and Points are the same colour, it is possible to change the colour. To do this, do to Manager tab, then Settings, then Object Styles. This will open the Object Styles for the current conceptual mass family you are working on.

image

Next click on the Annotation Objects tab. Here you will find listed Reference Lines, Reference Planes and Reference Points line type and colour settings. You can then adjust the colours to meet your needs. To change the colour of Reference Points, just select the Line Colour from the Object Styles window. In the example below you can see that I have changed the point colour from purple to red.

image

In this example I have altered the planes and points.

image

Thứ Sáu, 19 tháng 2, 2010

Pointless stuff, Offset parameter in Revit massing

This article builds on recent posts on the use of Reference point, when working in the conceptual massing environment. The more I use them, the more I realise how powerful they are.

If you place a “Reference Point” and take a look at its Instance properties, you will discover its a System Family.

image

You can control how it displays in the conceptual environment; for instance you can change the Show Reference Planes Parameter. You are provided with three options “Never”, “When Selected”,  “Always”. You can also control its visibility by enabling or disabling the “Visible” parameter.

image

Under the Graphics section we can say whether its “Driven by Host” and you will also see an “Offset” parameter. We can also name the point. Lets focus on the “Offset” parameter.

We can drive the offset parameter, thus moving the point by adding a figure into the “Value”. This offset distance is based on the plane the point was originally position on. So if we add 1m into the offset it will move the point 1m in a “Z” direction, assuming it was position on the X,Y plane.

image

Now the smart thing here is because the point has a total of three planes, XY, ZY,ZX, we can also place points on these planes and drive points using there offset from the planes.

image

Take a look at the video which should hopefully explain this in more detail.

Thứ Ba, 16 tháng 2, 2010

The Liquidlogic Farmhouse

The Liquidlogic Farmhouse


In 2007 we moved our offices from the old farm house to consolidate our shop and offices at our original building.  As time has gone by we have done less shop work here in Hendersonville and moved more of those projects to the manufacturing plant in Greensboro North Carolina.  So the need for the shop has been less and less.  Yesterday we moved all the offices back in to the farm house, sometimes known as the Windy Knob.  This is the most pleasurable place I have ever worked.  The house sits up on a hill with a view of the horizon and blue ridge off in the distance.   At this location we are sitting directly on the Eastern Continental divide which is a whopping 2,013 feet, and we are a mere 5 minute drive to the put-in for the Narrows of the Green.  

The View from the house

There is how ever a darker side to this house.  The guy that lived here before we moved in was a hermit.  The neighbors didn't ever see him and the house was supposedly filled with things collected over the years.  The owner was excited to sell the house to us so they didn't have to deal with getting him out of the house.  The folks around the area said that he was a murderer, or criminal of some sort, probably no more criminal than we are.  It all went smoothly but we always wonder will he be back.  

Obie's Office

Soon after we moved in I was at the dentist office and the lady checking me in saw my van and knew that we had moved into the old farm house.  She said her parents had lived in the house for many years and had many haunted experiences.  With a totally straight face she told me about her parents being held down in bed by "nothing" while the lights went off and on.  Her parents also told her about trying to exorcise the demons by leaving a bible open to a particular place only to find it closed or on the floor in the morning.  As I was leaving she told me she was going to bring a photo by that was taken of the house long ago.  In the photo she said that you could see the ghost of a girl that had been murdered on the hill.  The house on the hill was even written about by Carl Sandberg who had a home in Hendersonville not far from here.

Steve and Woody's Office

When we first came to the house we decided to embrace the haunting.  We didn't try to exorcise the haunts we decided to party with them.  Not just in our own little ways.  We opened the house and hill to the Green Race Party, and Jerry's Baddle.  It seems the gremlins have decided that we are ok.

Cheers
Shane

My office

Autodesk-revit.blogspot and YouTube

image

Thought you might be interested to know that I now have an YouTube page where you can get access to all my posted videos. Some have voice, others don’t. I wouldn’t say that they are edited particularly well, but hopefully they will be of use to somebody. :-)

http://www.youtube.com/user/davidlightrevit

image

Thứ Sáu, 12 tháng 2, 2010

Helix from lines and points

Following two great blog posts on creating helix’s; one from Buildz blog and the other from BIM troublemaker, I thought I’d run through my solution to this problem. I have been experimenting with this for a few weeks now; not being great at math, I wanted to see if I could create a helix without the need for heavy formula.

image

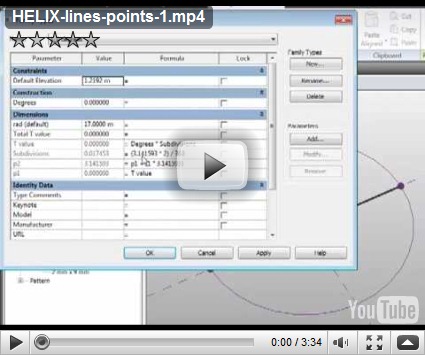
Hopefully these two videos will explain my approach; I’ve had to split the the how-to video into two parts, due the 11 minute YouTube limits! They include all the normal mistakes, so don’t expect a super slick video. :-)

If you interested, you can also download the family from here.

BIM Troublemaker

Be sure to check out BIM Troublemakers blog, some cracking formula work here…

http://bimtroublemaker.blogspot.com/2010/02/spring-is-in-air.html

Thứ Năm, 11 tháng 2, 2010

Get the hosted point?

This post comes from experimenting with hosted points on lines and arcs and attempting to create a helical form in the massing environment similar to Zach Kron’s recent post. I guessed that you could do something similar using lines connected to hosted points on circles.

So let go back to basics. Points can be hosted to lines, arcs, splines, circles and ellipses (either reference line or lines). Just draw a line or reference line then choose the point tool and place the point on the line. It will snap to the line and  you will  notice it will change in size and will now include a work plane.

image

If you select the point and choose properties, you will discover that there is now a hosted parameter. This parameter drives the position of the point and it goes from 0 to 1. “0” being one end and “1” the other end. If you wanted to place the point half way along the line, plug in 0.5, voila the point is position half way along the line.

image

So lines are straight forward, what about circles or even ellipses? Hmmmmm Ok, go ahead do the same thing, but this time draw a circle as a line or reference line and place a point on the circle. Go check the properties of the Hosted Parameter…. No 0 to 1???? some other weird combination of figures????!!!

image

So what’s going on here? Well I’m no mathematician, so after a bit of investigation I discovered that points are managed differently on closed elements such as circles. You need to go back to do some math…

So the hosted parameter value for a circle is 2pi

(where pi is 3.1415926535897932384626433832795)

therefore  2 x 3.141593 is equal to 6.283186 radians

So the hosted point can have a value between 0 to 6.28318 depending on where it is on the circle.

So to split the circle into degrees

1 degree=2pi/360=0.017453 radians

With this logic in mind try this, create a circle in the massing environment and host a point on the circle. Go the the hosted parameters, then plug in the following figures and watch the position of the points change.

  1. 0 degrees - 0 x 0.017453 = 0
  2. 90 degrees – 90 x 0.017453 = 1.570796
  3. 180 degrees – 180 x 0.017453 = 3.141593
  4. 270 degrees – 270 x 0.017453 = 4.712389
  5. 360 degrees – 360 x 0.017453 = 6.28308

This opens up to interesting opportunities and allowed me to create the helix using points and lines along with nested families. I’ll show you how I did this in another post……

image