Thứ Hai, 8 tháng 5, 2006

Fiberglass, Stage II

With the help of my brother on Sunday, I was able to fiberglass the deck then the inside of the hull. The deck fiberglassing went quite well and in the end I was happy with the way it turned out, smooth with a minimum of excess epoxy. One obstacle that caused us a certain amount of grief was the coaming area. While I was doing most of the mixing and applying the epoxy to one side, my brother Ken applied the epoxy to the other side and as he went along, a wrinkle developed in the cloth. This came to a head at the cockpit. We had troubles resolving this wrinkle and also with trying to get the glass to lie flat and make the turn up the coaming riser. The glass repeatedly wanted to pull away from the fillet at the base of the riser. In order to rid ourselves of that nasty wrinkle, we cut the cloth, allowing the glass to overlap itself beside the cockpit an inch or two and eliminating the wrinkle. The overlap created a bit of a step which I later scraped away quite easily. In retrospect, this cut was definitely the right thing to do. The glass wanting to pull away from the riser fillet was a bit more tricky and required a lot of babysitting to get it to stay put until cured. There are still a few bubbles there but I won't tell if you don't. In retrospect, it probably would have been better not to have put in the riser until after the deck was glassed, then to add glass to the riser afterwards, extending that glass down onto the deck. My reason for doing it the way I did was so that I would gain the strength of having continuous glass from the deck and up the riser, and it seemed like it be a bit simpler rather than spreading it out over two glassing operations. The other, and perhaps main reason I installed the riser prior to glassing the deck was that I had time to do so since I couldn't do the deck fiberglass last weekend with my youngest daughter being sick.
Above: The 1/8 birch ply coaming that caused some grief while glassing, and the region of where the wrinkle was cut out. Below: A close-up of the cut and overlapped region.

One spot I was a bit concerned about was on the fore deck ahead of the cockpit. I inserted into the deck a hand-carved feature (which I'll discuss further in some other posting) which had a fair bit of relief to it. My concern was that the hollows of the carving would trap air and not fill properly with epoxy (although the carving had been previously coated and the hollows were partially filled). We took care of this area by lifting the cloth and filling the hollows of the carving with unthickened epoxy, then laying the cloth back down, and continuing to brush on the epoxy on the deck as we had been doing. It seemed to tun out fairly well with only a couple of smallish bubbles trapped under the glass (I may try to get these out with a syringe & needle). I must be getting better at squeegeeing because this went much better this time than on the hull. All in all I'm extremely happy with how the deck has turned out so far.
Above: The glassed deck in the foreground, the hull in the background.
Now the inside of the hull on the other hand .... Well let's just say it's a good thing it'll be under the deck and if someone examining the boat has the audacity to stick their head into the hatch to have a look, I'll just hit them over the back of the head with a greenland paddle. I didn't fill the gaps inside the hull and I didn't sand to the same level of perfection as on the outside. I chose to get aggressive with those epoxy drips and that meant attaching a 36 grit sanding disc to the drill and going after them. For the record, 36 grit will chew through cedar and anything else in it's way VERY quickly. Although I never went all the way through, there is the occasional divot (read gouge). I sanded the hull to 80 grit with the ROS to take most of the gouges from the 36 grit disc out, particularly in the cockpit area. Working in the concave and confined regions of the bow and stern was a bit tricky and I didn't spend a lot of time there to fair things out. I used a fillet in these regions so that the v of the bottom and the stems were rounded out to allow the glass to lay into the hollow a bit better. Getting the glass to stay tight in at the bottom of the stems was still a bit difficult, with the glass wanting to pull up and away. One thing I thought of but didn't try was to use bags of sand in these areas to weigh down the glass, pushing it tight into the cavities. This method would have the added benefit of squeezing out the excess epoxy. I also found squeegeeing inside the hull to be difficult. It seemed that no matter how careful I was, the squeegee would pull the cloth away from the relatively sharp corners at the chines (imagine the troubles I might have with a hard-chined boat!). As a result of this combined with the difficulty of squeegeeing in the confined space at the bow and stern, I am sure I have more epoxy in the hull than I should. Incidentally, I added a second layer of 6 oz. glass in the bottom of the cockpit area (layed out underneath the larger glass cloth sheet covering the rest of the hull).

Below: A pretty pattern of swirl marks left behind by the 36 grit disc on the drill. Most of these were sanded out in the cockpit area but these shall remain for eternity.

In addition to the troubles already mentioned, in the hull I also had bubbles forming from air coming out of the wood itself. I had heated the shop to 20C overnight and things were a nice steady temperature by the morning and the heat was turned off (everybody knows you want the temperature to be steady or dropping while doing the fiberglassing). We started our epoxy work in the morning on the deck and after lunch moved to the hull. As we worked on the hull, we noticed it starting to get rather warmish in the shop. The weather outside had risen to a beautiful 20C in bright sunshine, so that may have been helping to warm the shop, but I didn't think that it would make that much difference in a well-insulated shop with a concrete floor that is still holding the cool of a Canadian winter in it's mass. I am therefore led to wonder if the rising temperature was due, in part at least, to the exothermic reaction of curing epoxy. Through the afternoon the temperature inside the shop rose to 24-25C. The temperature rise produced the promised result - bubbles formed under the glass as expanding gasses escaped the wood but then with the wood sealed on the outside, were trapped in thickening epoxy on the inside. Many of these bubbles did actually find their way to the surface, but at least a few did not despite my encouragement. I'm not overly concerned about their presence, but I'm glad it happened on the inside of the hull and not on the topside of the deck.

In the end, I'm not too concnerned about the imperfections inside the hull. My wife suggested the extra bubbles should be considered flotation and I think that's a good approach at this point. The glassing of the underside of the deck should go a bit more smoothly - the curvature is much less than the hull and there are no tight confines to work within and no chines to deal with. Also, the gaps between strips are much less than occured on the hull (again due at least in part to less curvature) so the surface is smoother. My peak this morning under the deck also indicated that there are far fewer epoxy drips coming through to deal with. I think I'll put the 36 grit sanding disc away and stick to hand sanding or a random orbital sander with at least 80 grit paper. For glassing underneath the deck I'll be using 4 ounce West Systems cloth, doubled (tripled?)around the cockpit to provide some extra strength for sitting on the deck while getting in and out.

Below: One final photo for the night - taken on Saturday when my daughter was helping me sand/scrape/grind the inside of the hull in preparation for fiberglass.
Thứ Ba, 25 tháng 4, 2006

Hull Off of the Forms

Having given the hull fibreglass a few days to cure, I pulled the hull off of the forms last night. It was a bit tough to break it free of the forms. The contoured shape lends itself to hugging tightly to the forms, especially at the ends. Also, every staple hole bled epoxy through and into the form where ever a staple used to be. These tiny epoxy bonds aren't much individually but they add up over the whole boat. A third factor was the masking tape I used to prevent glue from sticking to the forms - glue & epoxy stick to masking tape quite nicely. Clear packing tape would have done a much better job and allowed easier separation. A fourth factor was the internal stems that were hot-glued in place to the end forms (masked with duct tape) and I had also added epoxy thickened with sawdust in that region in order to strengthen the bond between stem & strips, but some of this bonded to the duct tape on the endforms too (not a strong bond, but something extra holding on to the forms).

In order to separate the hull from the forms, I had to go along the boat, breaking the bonds at each individual form - first breaking the sides at each form on each side, then going back and breaking the bottom of the boat away at each form. With only the endforms holding things in place, I used a screwdriver to pry the boat up off of the endform prying against the internal stem (mahogany) piece. With a minimum of disturbing cracking sounds and groans the hull lifted up off of the forms.

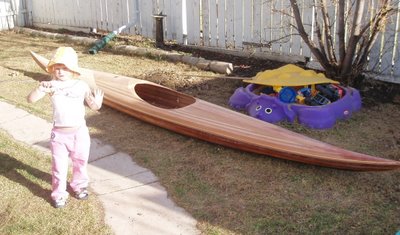
With the half-glassed hull off of the forms, I took the opportunity to lay it on the lawn and take a couple of photos along with the unglassed and somewhat fragile deck. I allowed the kids to try it out, but refrained from sitting in it myself.

Above: A look inside the hull. You can see the masking tape that pulled away at each form, staying with the hull as well as the duct-tape I used to mask off the internal stem before hot gluing it to the end form. You may also notice the tons of epoxy drips where epoxy leaked through all my loose joints between strips. Anybody know the best way to remove those rock-hard drips?

Above: My daughter shows off the partially completed kayak. Below: Both daughters try out the boat for size. I made sure that they put no pressure on the deck at all, especially the cockpit recess. I decided they could forgo the life jackets this time around.

With a look at everything in the sunlight and having satisfied my curiosity regarding what it might look like when complete, I turned the forms around on the stands and put the deck back on the forms. I have a bit more sanding to do to remove excess dookie schmutz/epoxy filler on the deck (seen as a brown splotch near the stern in the second photo above) but I should be able to glass that on the weekend (Sunday?). The hull is now sitting on the same cradles used to support it while I stripped the deck so that I can work on smoothing the inside and preparing it for glass. Perhaps I'll be able to do that at the same time as the deck's topside.

Thứ Hai, 24 tháng 4, 2006

Fiberglass, Stage I

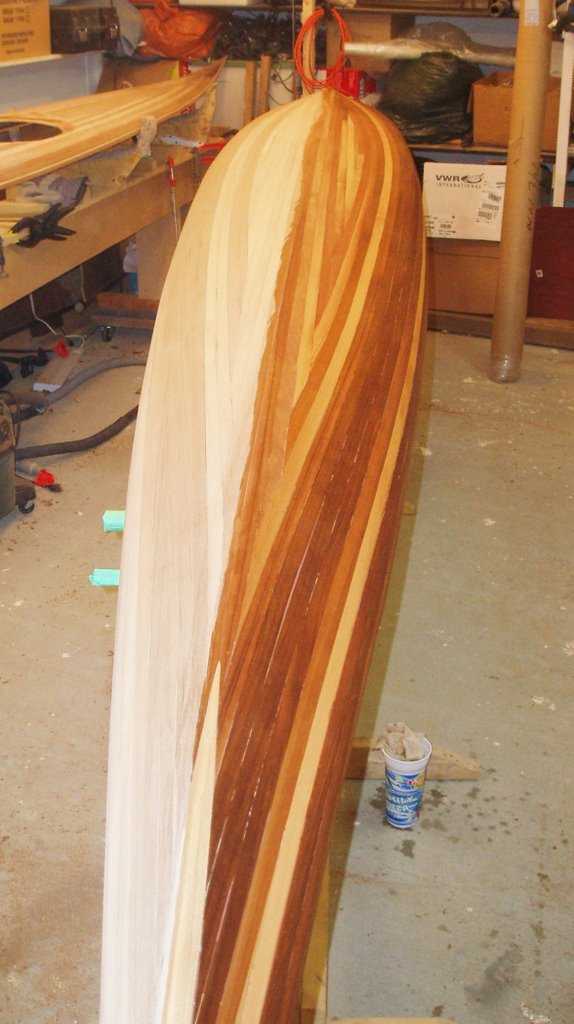
I had a very satisfying moment late Saturday night. In the final preparations prior to fibreglassing the hull, I wet down the hull with a damp rag. This brought out the colours of the cedar from the dull tan colours I've grown familiar with, to vibrant rich browns ranging from deep chocolate to bright amber and that beautiful cedar colour that people love. It was amazing.

It was about 12:30 am and my wife had been asleep for some time. I wanted to run in to the house and get her so that I could show her, but I decided against that. She assures me that that was the right decision. Instead I posted a note on the Kayak Building Bulletin Board – those folks are much more appreciative of this sentiment, and some of them also happened to have been up late working on their boats.

The above photo shows the hull supported on the forms & internal strongback, which in turn is supported on the stands. The deck has been removed from the forms for the moment and is sitting in the background. I'll put the deck back onto the forms prior to fibreglassing.

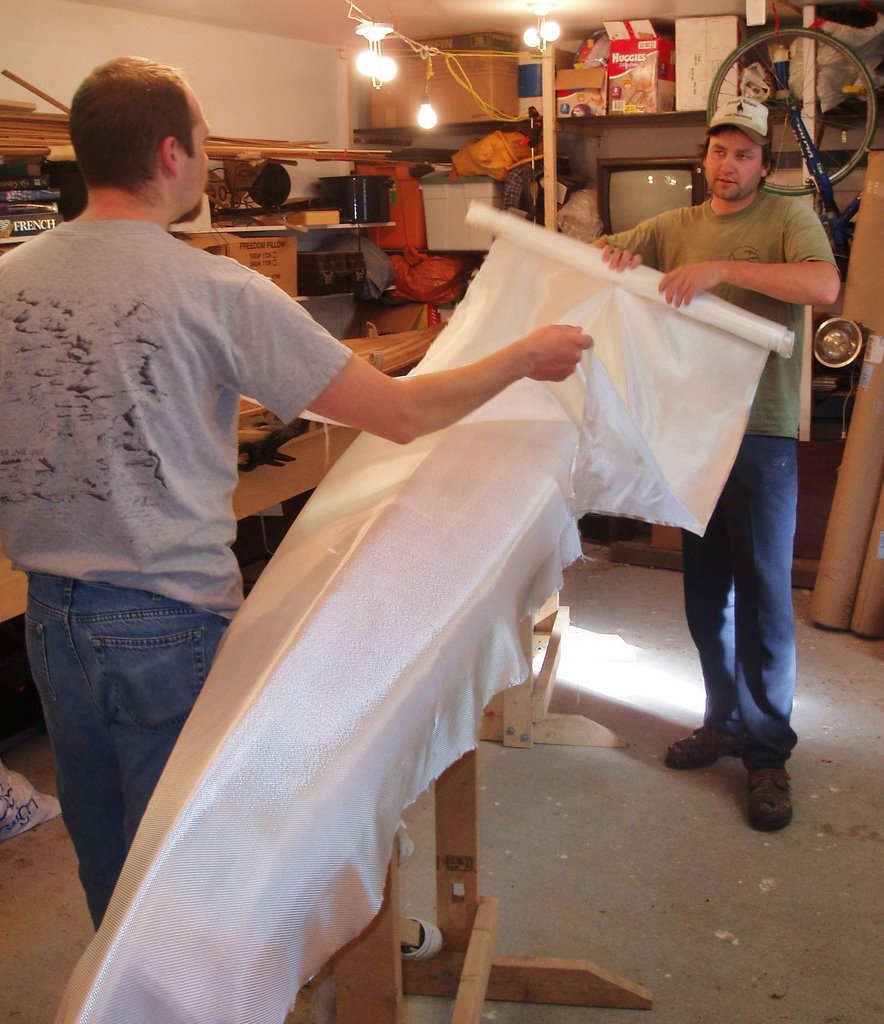
Early the next morning I gave the hull a final sanding with 120 grit paper and wiped it down with acetone to remove the dust and any contaminats. With the aid of Rob & Martin (the latter of Kisseynew Canoe Co.), we began the task of fibreglassing the hull. Initially, I was going to lay on 3 layers of fibreglass: a full layer of 6 oz cloth, an additional layer of either 4 or 6 oz over the central bottom area (the football), and another layer of either 4 or 6 oz along the keel line towards the stems. Martin cautioned me against this approach, feeling that it would add a lot of weight, but not much strength or abrasion resistance (my main reason for the additional layers). Instead, we used the full layer of 6 oz cloth with a strip of the same approximately 4” wide along the entire length of the boat. After some deliberation, we opted not to put the smaller piece on top as suggested in Nick’s book, but rather to hide it underneath the larger sheet. In the end, I believe we were correct to do it this way, as I had a very smooth transition at the edge of the lower layer rather than a step which can be sanded into as described in the book.

The above photo shows Martin & I rolling out what is to become a second layer of cloth. In the photo below, we're probably discussing the merits of various quantities of cloth.

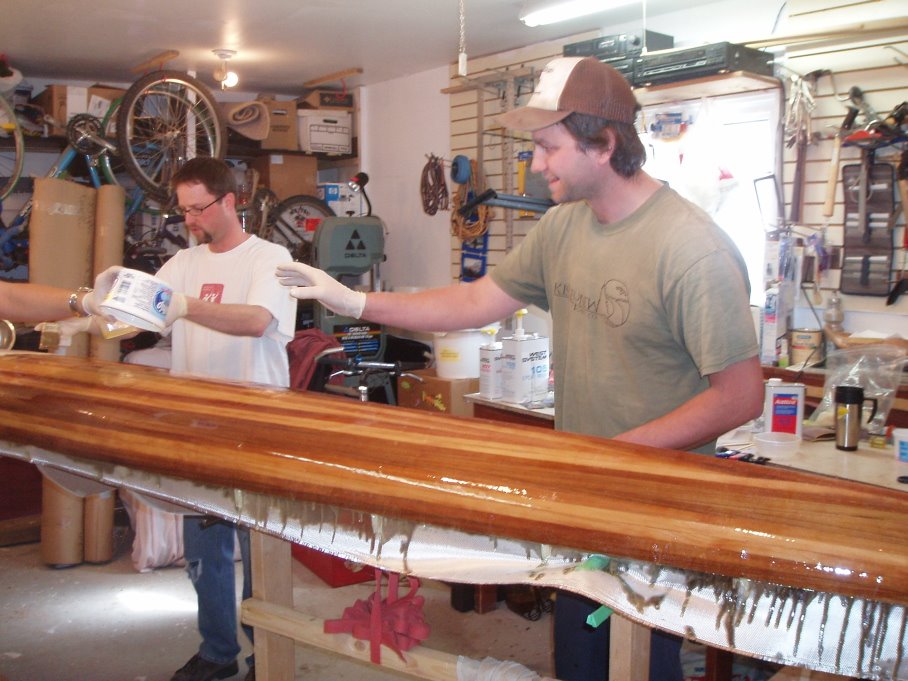
The fibreglassing went well I think. Martin pumped & mixed small batches of epoxy while Rob & I brushed it on with paint brushes to wet out the cloth, working from bow to stern. As we did this, Martin kept watch to ensure we were doing things correctly and keeping a watch for areas where the wood had soaked up much of the epoxy. We then squeegeed off the excess resin, again working bow to stern, just as the epoxy began to thicken. It would seem that I was not as efficient at this as was Martin. While sanding later I could tell the difference between which areas he had squeegeed and which I had. The areas he had done were largely flat and even. The areas I had done were less so. I think I did not remove sufficient resin in some areas as there were hills and valleys (albeit slight ones) present. At first I thought the hills were excess epoxy on top of the glass, but when I started to scrape & sand, I realised that the areas with visible weave were not the valleys as I first thought, but rather the hills. The areas where the glass was completely buried in epoxy were actually lower. It seems to me that the glass must have floated up on excess resin, creating the hills. Damn! That gives me something to work on for the deck I guess.

In the above photo Rob & I pour on the epoxy while Martin waits to mix up a new batch of epoxy.


Below, Martin mixes.

Once the fibreglass had cured to a “green” stage (no longer soft, but not yet hard) approximately 4 ½ hours later, I applied a second coat of epoxy, brushing it on then removing the excess by squeegee. I then allowed this to cure overnight before spending an hour the next morning sanding the whole hull with 120 grit to take off all of the high points. I’ll have to add a 3rd coat to completely fill the weave, but I think I’ll wait until the hull and deck have been reunited and the deck seams glassed before I do that.


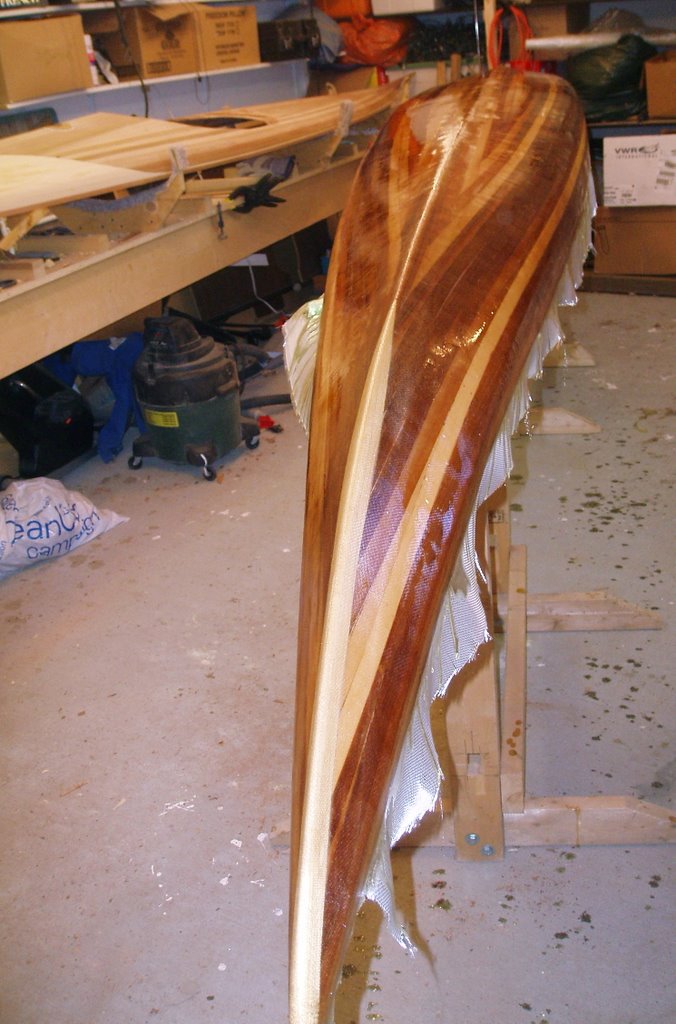
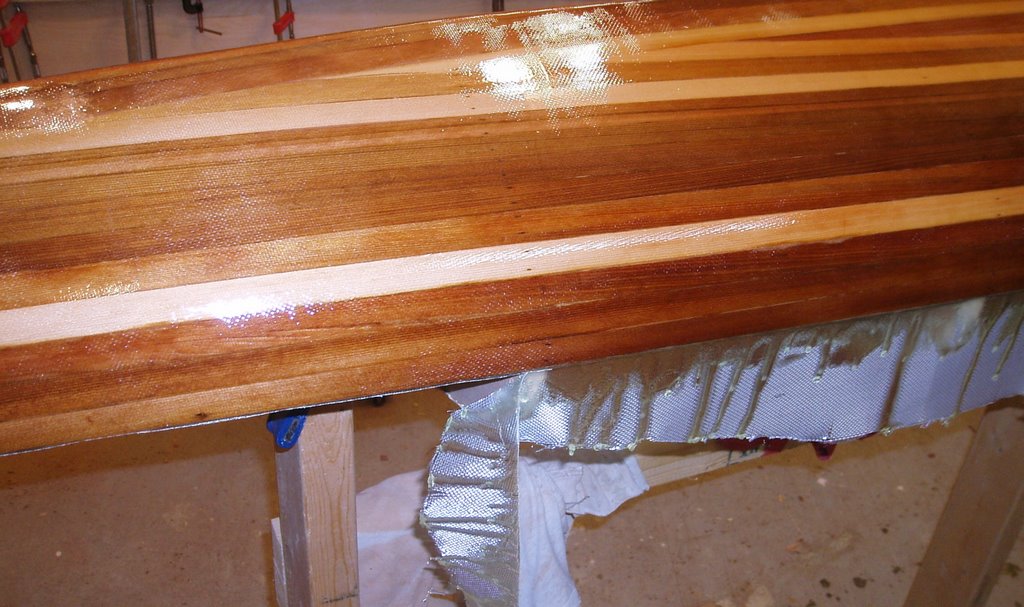
Above: The cloth overhangs the hull and helps to catch drips. Below: Once partially cured, I trimmed the excess cloth with a utility knife.

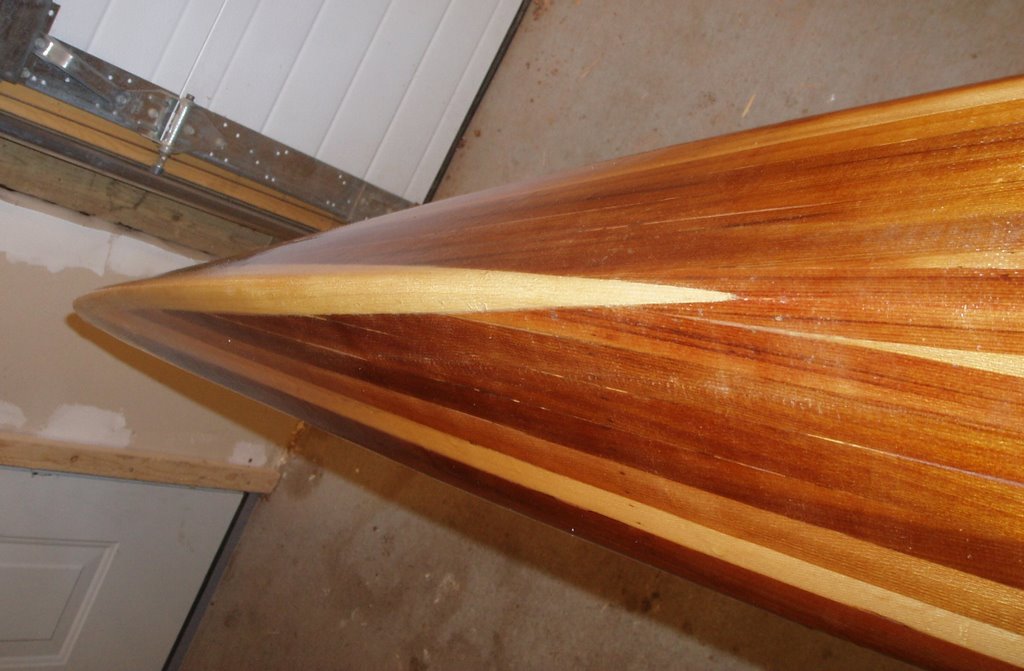
Below: One final photo for the night, this one of the ash stem on the bow.


Thứ Năm, 13 tháng 4, 2006

Chile with a couple Young Guns


Ian and Lane just spent a little time down south in one of my favorite countries to travel in. Chile rocks! 3500 miles long and around 150 miles wide. One border is the Andes mountain range and the other border is the Pacific Ocean. That makes for a lot of sick, sick whitewater. Every river pretty much tumbles out steep from the start, then working its way through miles of class 4 and then slowly mellowing out until it cruises the last bit to the ocean.


Ruta Cinco (Route 5) goes down the central valley north to south and acts as your access on just about every single run. The directions almost always start, "Get on route 5 go to kilometer marker number... and turn left up into the mountains." And so it goes you just work your way south from the capital Santiago down the length of the country picking river after river. I always just thought of it as a ladder of whitewater. Drive south, take a left, go upstream, put in, paddle down, get back on route 5, drive south, take a left, etc, etc, etc...


There are other highlights besides the paddling also. Very good, very cheap wine. Avocadoes for 25 cents. Great ocean surf. Lots of mountain views. Oh I almost forgot you have to have a Completo if you go to Chile. Just go to a little sandwich stand or resteraunt and ask for a completo. Hmmmmm nothing like piles of mayonaise on a hot dog. Makes me a little queezy just thinking about it.

There are a few obvious paddling highlights. The Pucon area is known for some amazing creeking and of course you get down south to paddle the bigger water like the Futaleufu, and Baker rivers.

It looks to me like this video that Ian and Lane put together is almost exclusively from the Pucon area. Great creeking, great food, and very hot Chilean, and Argentinian women. I am pretty sure that the rivers got the boys to Pucon but it was the ladies that kept them hanging around.

Chile Video from Ian and Lane

Hey Ian and Lane I hope you like the music I put to your video. Well done fellas.
Shane

Thứ Ba, 11 tháng 4, 2006

Video of Pat Camblin in Africa with the Vision Bigfoot


Here is a video that Pat sent from his last trip down to Africa.

Pat, Vision Bigfootin' in Africa

Pat said he was super psyched with the Bigfoot because he was quite a bit more comfortable and able to sit in the boat all day long. The only thing that changed are the size of the footbumps from in front of the security bar recesses to the end of the boat.

Awesome video of Pat as always.
Later
Shane

Thứ Hai, 10 tháng 4, 2006

Like Wrestling a Greased Pig

I made some more progress over the past week, having made a big push in order to try to get ready for fiberglassing by yesterday (Sunday) morning. I didn't get that far, but at least I'm closer.

I had filled all the gaps on the deck with thickened/coloured epoxy, and I did the same for the gaps in the hull. I then set about scraping all the excess epoxy & thickener off. Well, that has turned out to be quite a chore. I have sanded, scraped (with a sharp paint scraper and with cabinet scrapers), planed in an effort to remove this rock-hard crap. {For future reference: it's probably way easier to do this when the epoxy is in the "green" stage of curing rather than the "granite" stage.} I eventually got all of the extra dookie schmutz (that's the technical term) off of the hull, only to have revealed more gaps in the process. Frankly, I think I'd best leave those alone before things start getting worse. I am only half done cleaning up the excess dookie schmutz from the deck.

I also attempted to get those stems laminated into place. I had wanted to make use of some walnut I had laying around (cutoffs bought from the local Habitat Re-Store) so I cut it into approximately 1/8" x 1" x 3-4' strips on the band saw. These strips were pretty uneven in their thickness and were far from smooth, but I figured they oughta be good enough to do the job of protecting the stems from wayward rocks. As mentioned in my last post, I steam bent them, and taped them in place to dry. I later decided that the job of bending was pretty unsatisfactory at the tips where the bend is greatest. It was hard to get them to bend just the right way and have them align well and remain clamped in place on a rounded tapered surface. I decided instead to try ash, since it is renowned for being easy to bend, and is well suited to the job of protecting the softer cedar while being easy to carve to match the shape of the boat. I went to my local Windsor Plywood and picked up a 4/4 6" x 4' piece of ash and another of walnut. While there, I paid a few extra dollars and had them cut the ash into 1/8" strips and they did a MUCH nicer job than I did on the bandsaw. Before using the ash strips, I decided it was worth a try to cut a solid piece of walnut to fit, rather than attempting to bend wood. I made a template out of cardboard and transferred the shape to the walnut and cut it out on the bandsaw. The fit needed tweaking, but I found working on the concave curve to be difficult, so I turned my attention instead to using the ash strips. In order to make handling the strips manageable, I taped one end of 6 strips together, then taped this bundle to the keel on the bottom of the hull. I then bent the strips to the keel and taped the strips in place as I went. Once the curve became greater near the tip, I used the heat gun to soften the wood fibers and allow the wood to bend more. What I found with my (mis)application of this technique was that I could create a very sharp bend in the wood (a sharp 90 degree bend was easy), but it was hard to get the wood to bend gradually over a short distance. This probably was a factor of my inexperience. Regardless, I got the wood bent acceptably to match the curve of the stem and taped & bungeed in place until it could cool. With the wood pre-bent in this manner I then mixed up some dookie schmutz using epoxy and the 406 Colloidal Silica to create a mayonnaise consistency glue and painted this on to each side of the wood strips, stacked this up then attempted to wrestle this slimy greased up mess onto the bow stem, taping it in place with fiber-reinforced tape. This proved to be a bit tricky, as two gloved hands were required to keep the pile of strips in place, another hand was needed to wrap the tape around, and another hand was needed to cut the tape with a knife. The whole operation is complicated by the fact that the substrate being attached to is round and tapered. Add to this the fact that my rubber gloves kept disintegrating (if Home Hardware made condoms, I think they'd have an awful lot of paternity suits on their hands; if the gloves I used at work were this crappy, I'd probably have died of strep pneumonia or a staphylococcal infection by now), and I was not a happy camper. However, I managed it by myself and soon left the taped, bungeed, strapped conglomeration alone to cure. Thankfully, Rob was able to come by in the evening and this made the repeat process on the stern a lot easier.

I shoulda had a look at this guy's blog - maybe those inner tube straps would have worked better than the tape.

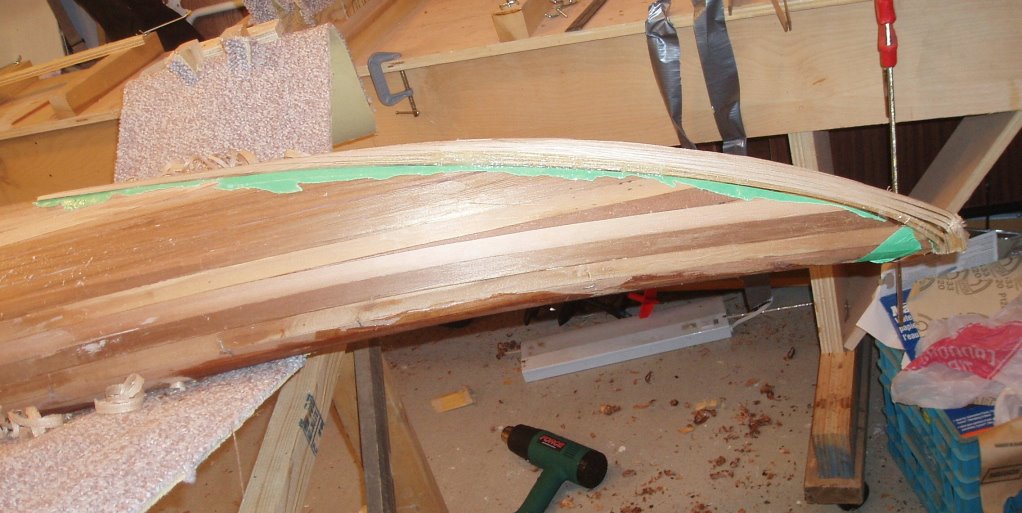
Here's a picture or two of the stern stem laminations taped in place. I used the green masking tape to mask off the area so that there would be less epoxy to clean off of the hull. This is the one Rob helped me with; the one I did alone wasn't quite so neat.

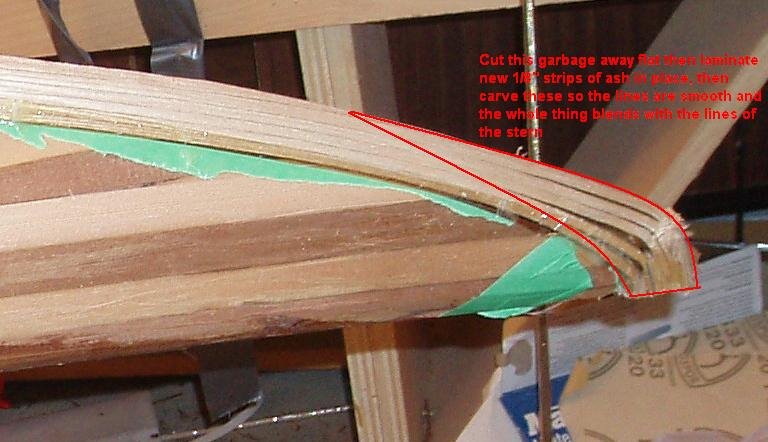
Once I removed the strapping tape a problem at the stern tip became evident:
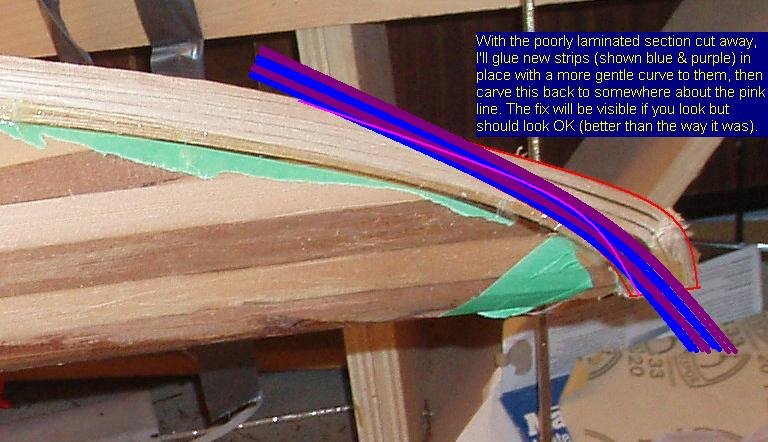
Looks pretty bad, doesn't it? It seems I didn't have things aligned well enough at the tip and/or it wasn't taped in place tight enough. I began shaping the stem with the block plane anyway.Note that I masked off the hull too close to the stems, trapping green masking tape under the stem edges. This was all planed away in the process of shaping the stem so it's not so bad as it looks. The next couple of images show how I intend to fix the problem of the crappy lamination & bends. I'll cut away all of the poorly laminated section, leaving a gently curving squared off area on which I'll glue some new pieces.

Once those pieces are glued in place, I'll shave them down to match the flowing lines of the stern. The only thing I'm not too sure about is how in the heck I'm going to clamp those suckers in place until the glue sets. One thing I thought of was to maybe use thick cyanoacrylate glue with accelerator so that they wouldn't need to be held for long. Anybody know if this will work? Is it strong enough to withstand the abuse that planing would put on the glue?

Thứ Ba, 4 tháng 4, 2006

Steam Bending and Gap Filling

Things have been pretty slow going around here recently but I have gotten a few things done.
  1. I rough sanded the deck.
  2. Last week I cut out the cockpit hole, so the boat, again, has a hole in it. This is as far as I'll take the cockpit until after the deck has been glassed.
  3. I cut another hole in the kayak, this one is a circle of about 4" or so in diameter and is located just fore of the cockpit and was cut to accept a carved feature I made for insertion in the deck (more on this in a subsequent post).
  4. I finished the carved feature mentioned above and after a great deal of mucking about with it, inserted the carved piece with walnut center into the kayak deck and glued it in place.
  5. More sanding on the deck.
  6. I made a fairing board for sanding by attaching handles to a piece of 1/8" hardboard sized to accommodate a layed out sanding belt (from a belt sander). This works well, I should've done it sooner.
  7. I built a plywood box for steam bending the walnut strips which are to become the external stems (bow & stern).
  8. I screwed around with an old electric kettle to get it to work properly for the steam box. First I had to bypass the thermostat so that it would continue to boil for the necessary time. Second, I had to come up with a pipe set-up in order to carry the steam into the box. It seemed that the steam would have rather gone anywhere other than into the box (no, the box was not sealed too tightly) prefer to escape at the several weak points in my system. The final set-up used a PVC pipe (1 1/2"?), duct taped to the kettle with a second piece of pipe (2"?) slipped over top and a third piece (1 1/2"? again) which fit inside the larger piece, giving a telescoping arrangement. The pipes were sealed with duct tape, and sealed to the box with duct tape. Too bad duct tape sucks with respect to resisting steam. Oh well, it worked long enough to hold in the steam for 20 minutes or so at a time.
  9. I made forms to replicate the shape of the stems on which to bend the steamed walnut stems and hold them while they dried.
  10. I steamed the walnut, bent it around the forms, and clamped it in place for it to dry overnight.
  11. I mixed up and applied some thickened epoxy to fill the gaps on the deck, using a light yellow mixture as shown in an earlier post for the alaskan yellow cedar section of the deck, and a brownish mixture for the western red cedar section of the deck.
  12. I learned that if you mix up ~2 ounces of epoxy (1 pump resin + 1 pump hardener) and let it sit in front of the heater for a couple of minutes so that it becomes warm to reduce the viscosity, it will get smoking hot (very literally) when it begins to "kick". It seemed the perfect consistency when I started to use it to coat my carving (I wanted to ensure it would flow into all the nooks without trapping air) but I was really surprised how quickly the epoxy went from a thin liquid to semi-solid. Although I managed to get the carving mostly coated before the resin became unusable, it was only barely and I didn't fill all the valleys as I planned (no problem, I'll get it on the next go around).
The next few steps will be to scrape/sand off the excess epoxy putty, sand things smooth again, glue the stems in place, shape the stems, fill gaps on the hull. At that point, I think I should be ready for glassing.